Sunday, October 26, 2008

Picking Carrots, Planting Potato Onions

Today was a beautiful Fall day here in Kentucky. I cut the grass for the last time this season and cleaned up sticks and leaves. I also was able to work on the greenhouse a bit more.

My younger daughter came outside about when I was finishing up and asked if there was any gardening that she could do. Of course there is always something to do in a four-season vegetable garden, so she got to work picking lettuce and carrots.

Then, together we got a growing bed ready by adding compost and turning the soil over. Here, she planted some more garlic and potato onions.

Not many people are familiar with potato onions. If you like onions and have never grown potato onions, I strogly suggest that you look for some to try. They are a bunching onion similar to shallots, but they actually produce round bulbs. Here is what they look like while they are growing.

Last year was the first time we grew them and they were great. We ate them just as we eat regular onions. They are even easier to grow than regular bulb onions. They are planted in the Fall, and sprout in the Spring about the same time that daffadils do. They aren't harvested until mid to late Summer. It is a long time from planting the bulbs to harvest, but other than watering, he gardener has nothing to do for them. The potato onions that we grew are an heirloom variety so any bulbs not eaten can be planted again in October for the following season. That is what we did today and I can hardly wait to harvest them next summer.

It is really great to see garlic and potato onions growing tall and green in early Spring. For our vegetable garden, that has become the official beginning of the new growing season. It'll be here before you know it.

Tuesday, October 21, 2008

First Fall Frosts; Gardening Continues!

Our first Fall frost hit pretty much on schedule, and now three out of the last four nights we have seen heavy frost.

For my friends and neighbors who have a vegetable garden, this marks the absolute end of the season as they peer out at their now dead tomato plants.

For me however, vegetable gardening continues. Frost simply marks the beginning of an exciting Fall garden. This weekend my family transplanted the last of our broccoli and cauliflower plants, planted garlic and potato onions and harvested lettuce and other greens. My daughter enjoyed planting the garlic.

We have lots of cabbage and broccoli coming on, but full heads won't be ready for another week or so.

Our best Fall garden success so far has been with salad crops. In just a couple 4x4 square foot beds we have been picking all the salad we can eat for the past month, and hope to continue for at least another month.

Lettuce, greens and Brassicas all grow well when it is cool. Many gardeners raise them in the Spring but don't think of growing them in the Fall. Now that it is freezing at night though, the trick is to keep the plants from freezing. This week it is only getting down into the thirties, so covering them with row covers is enough protection.

Soon I will cover the beds with hoops and plastic or cold frames for added protection. The last of the lettuce transplants will be planted inside the insulated greenhouse beds to hopefully extend salad season into December.

Growing vegetables in the Fall and Winter is a little extra work, but I think it is worth it. It was pretty neat being out in the garden in the cool air this weekend as the Canadian Geese sang above me on their journey south.

The geese show that nature is getting ready for Winter, so I must ready my garden for it as well.

How about you? Those of you who are also headed into the cold season, do you continue growing or harvesting in the Fall and Winter? All tips and pointers are welcome.

Wednesday, October 15, 2008

Garbage Can Potato Harvest!

I like to try new things in the garden. Every year I find new things to grow and new methods to try. One of the "experiments" this year was trying to maximize yield by growing potatoes in a garbage can. I have been receiving many questions about the status of these potatoes. Well, we finally knocked over the can to see if it worked.

The idea is that you plant the seed potatoes down in the bottom of the can. As the plants grow, you fill more soil around them. Eventually, the can is filled to the top with soil and the plants are growing out of the top like this:

With proper nutrients and moisture, the potato plants send out new tuber growth all along the buried stems. The hope is that at harvest time, the garbage can would be filled with potatoes. You can see my first two posts about this idea here and here.

So it is finally time to harvest these garbage can potatoes. Here we go:

Wow, looks great doesn't it?

I could stop with the above pictures and say that everyone should switch to this method, but I won't. I always say that the purpose of this blog is to document happenings in my organic garden - to report what works and what doesn't.

Writing about what works is more fun, but this potato can actually didn't work very well. Here is a picture of the complete harvest:

That's not any more than I would have gotten if I had just planted these potato plants in the ground. So what happened?

First of all, I had four or five plants growing out of the can in the first picture of this post. All but one plant died in July. This is what the can looked like before I knocked it over:

All of these puny little potatoes might have come from this one plant. The bigger problem I think I had was that the plants didn't get enough water. When I try it again next year (and I will), I think I should change my soil mix. This mix was mostly compost, peat and regular garden soil. Next year I will add sand and have much bigger drainage holes at the bottom of the can. I want to be able to water more often and more thoroughly without the worry of being too wet.

What about you? Do you have any ideas about how to make this concept work? I know it can work. We have done it before on a smaller scale. My daughter had success with this last year with potatoes in her garden bed by enclosing two plants with wood and raising the soil around them. I know other gardeners who have raised potatoes like this in tires and even in garbage cans. What is the secret? If you have had success with this, please let us know. I know I've read about this on other good blogs but I don't remember where. If you have posted about this, please share the link for us. And if you haven't written about it, but have had some success with potato growing like this, please give us some tips.

I'm sorry to say that I am not an expert on this yet (obviously), but together I think we can perfect this method. It does work - but how?

Monday, October 13, 2008

Simple Green Frugal Co-op

I am excited to announce a new co-operative blog being put together by Rhonda at Down to Earth called simple | green | frugal co-op

Simple Green Frugal is by a group of writers from around the world who focus on simple, green and frugal issues from a variety of experiences and viewpoints.

I am honored to be one of the writers. Come check it out!

Thursday, October 9, 2008

Why we built our poly tunnel hoop house

I have wanted to have some kind of a greenhouse for the past 15 years but to buy a pre-built greenhouse that is big enough to turn around in costs many thousands of dollars. We have found that with many home improvement projects, it is much cheaper if you can do it yourself. So for the past year or so, I have been researching how to build your own greenhouse. I read many books and magazines and these are my favorite books about building a greenhouse, hoop house or poly tunnel and how to use them after they are built:

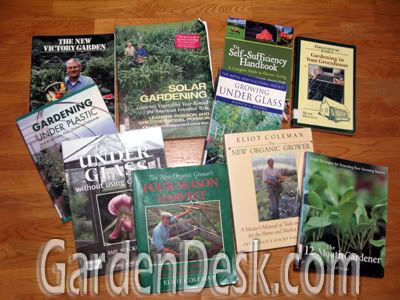
Some books speak only of how to use a greenhouse structure but the best are those that teach all of that AND a way to actually construct a hoop house. Through my long search, I have whittled the books down from dozens to my favorite four. They are Four-Season Harvestby Eliot Coleman, Solar Gardening, Growing Vegetables Year Roundby the Poisson's, Gardening Under Plastic by Bernard Salt, and my new favorite where I got our greenhouse plans from - The 12-Month Gardenerby Jeff Ashton. These four books convinced me that I MUST have a greenhouse.

Using row covers, cloches and cold frames for a few years showed me that I could extend the growing season in the Spring and Fall. A Poly Tunnel is one step further in that direction. Consider what Eliot Coleman's wife Barbara Damrosch wrote in the Forward of his book. Damrosch is an expert in her own right and I love the way she writes. After explaining the harsh conditions that each season hits the gardener with, she says how we can overcome those things with cold frames and a hoop house. She writes "Imagine, instead, a scenario in which spring work begins more gradually, summer spares time for other outdoor pleasures, fall is a gearing-up rather than a giving-up, and winter, best of all, is a time to reap a fresh harvest with almost no work." Yes, Barbara, that is what I want! And with the tough economic times we are in, my family needs to grow much more of our own food.

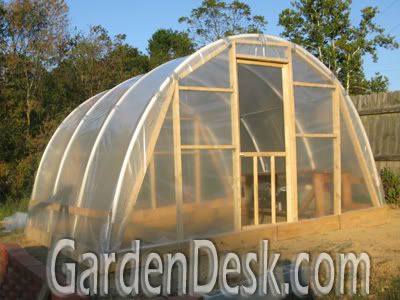
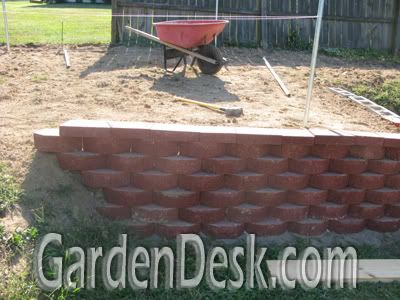
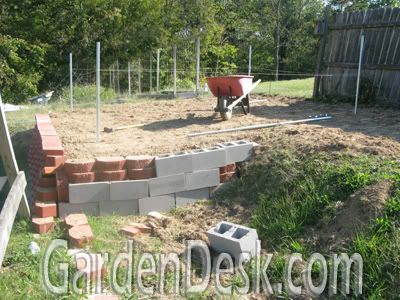
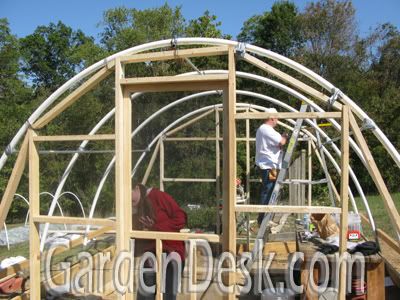
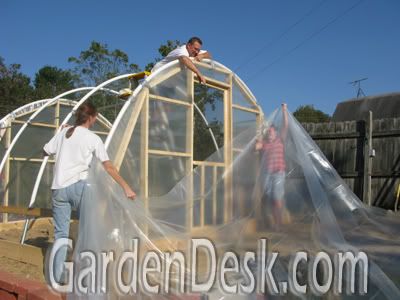
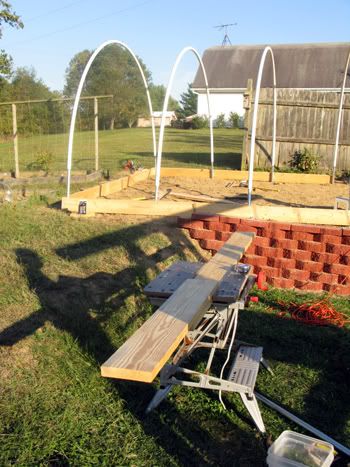
Speaking of economics, what did our greenhouse cost? We put much more wood in the end walls than you have too, which raised our cost. Even still, I got all the materials for a 14 foot by 24 foot greenhouse including an exhaust fan and professional greenhouse plastic for around a thousand dollars. It probably could have been done for much cheaper but we wanted a permanent structure. (The dimensions of our greenhouse in the previous post are 14x12, not 14x24. We will build the 2nd half next year after the retaining wall is constructed.)

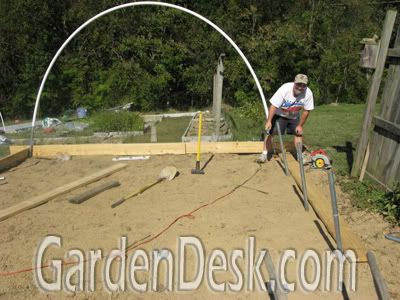
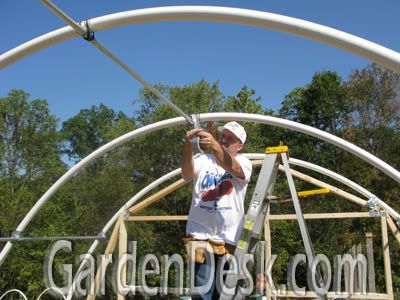
The design we used from Jeff Ashton's book originally came from an organic farmer named Steve Painter. Painter built his greenhouse in 1970 and other than changing the plastic and a little maintenance, the structure is still the same to this day! How's that for permanent?

Okay, so exactly what can you achieve with a poly tunnel? Bernard Salt lists many advantages in Gardening Under Plastic.He says spring is 6 weeks early and winter is 4 weeks later, bedding plants are grown very cheaply, half hardy perennials survive the winter, flowers are not damaged by wind storms, animals can not get to the crops, tender crops are more easily grown, and rain doesn't stop the gardener from gardening.

Eliot Coleman states that putting a layer of protection over a crop is like moving that spot a growing zone and a half warmer. For me that means our tunnel takes us from zone 6 to zone 7.5 (if there were such a thing). What's beautiful about this is that I plan to have a smaller plastic covered hoop over the inside growing bed, which will take that bed to zone 9. We're talking Florida temperatures here in Northern Kentucky! That's why I'm hopeful that we can keep things growing in the winter.

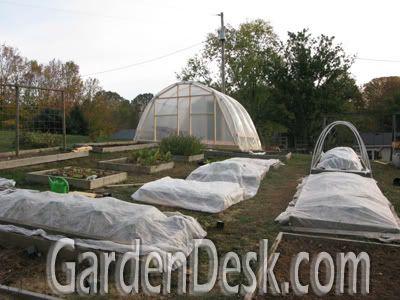
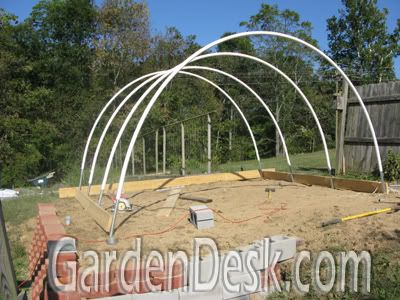
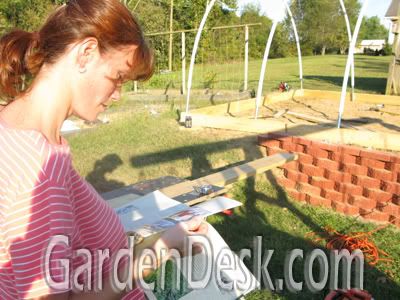
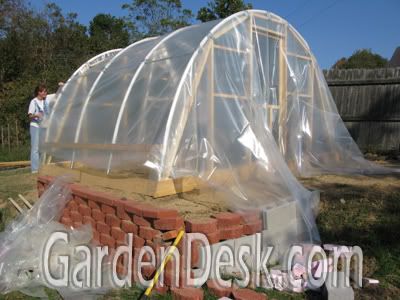
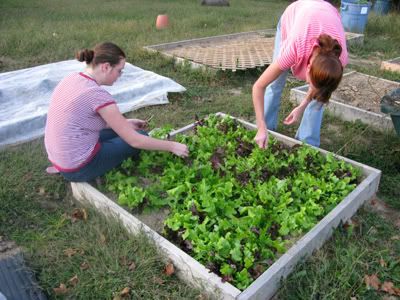
Since we just built our greenhouse and haven't been able to see any of these benefits yet, here are my two favorite things about it so far; My daughters really like it...

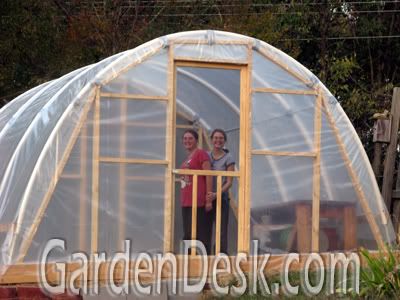
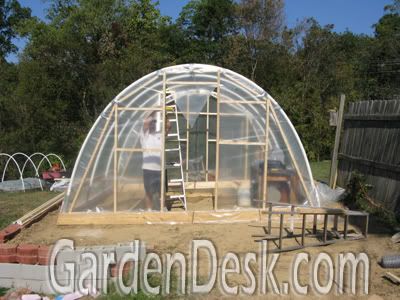
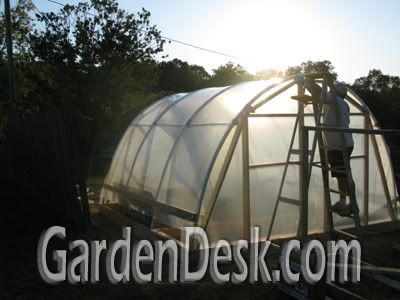
and it looks really good next to the garden.

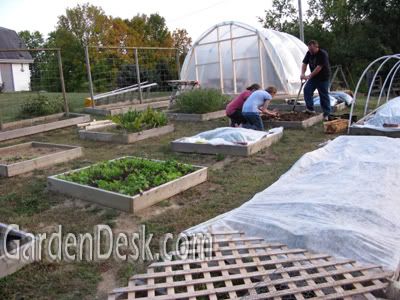
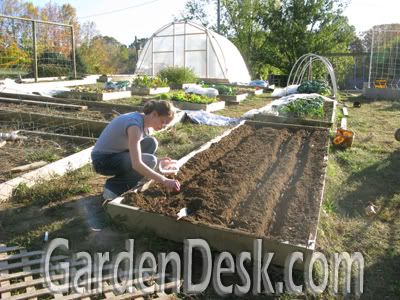
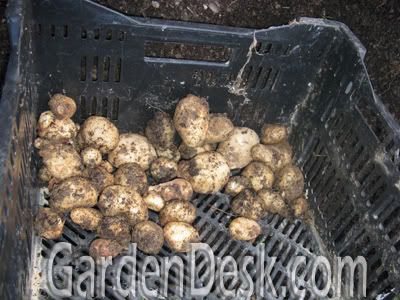
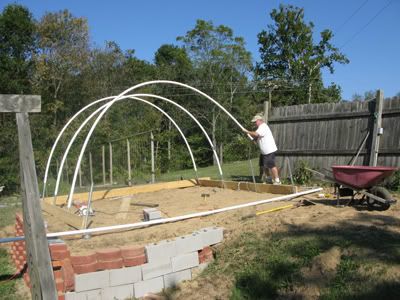
Here we are digging potatoes with the hoop house in the background.

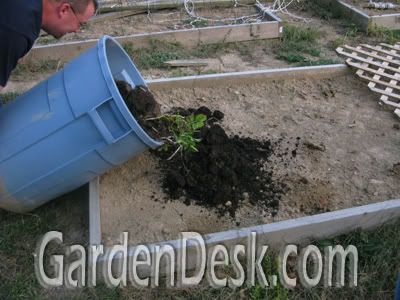
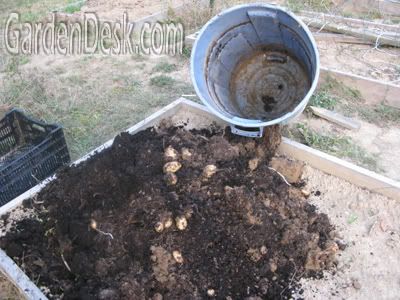
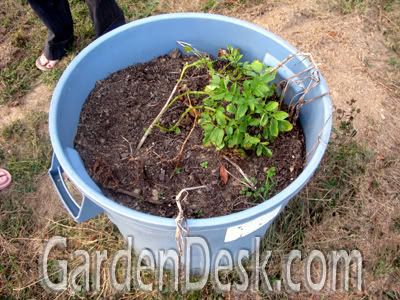
By the way, we finally tipped over our potato garbage can so I will be writing about it soon. The girls had fun with that too. It is so great to garden together as a family!

Tuesday, October 7, 2008

Greenhouse Almost Finished!

My wife and I literally worked all weekend to get our new greenhouse built.

It was much more involved than I thought it would be. There is still a little more work to do but we are very excited to have the plastic completely covering it now. It is 14 feet wide and 12 feet long, but next year we will expand it to 24 feet long. I am calling it a greenhouse because the book that I got the idea from calls it that. Also, the plastic covering is called "greenhouse plastic". This kind of structure could also call this a poly tunnel or maybe even a hoop house.

Instead of explaining the whole construction process here, why don't I just show some quick pictures? Later I will write a more comprehensive "how to" post if anyone is interested.

I think from the previous post, I left you here, with the PVC pipes being put in place:

Even before that phase, we first had to make a spot to put the green house. We wanted to put it in front of the garden by the fence where the early tomatoes were last year, and the kid's garden was the year before that. This spot was too narrow so my wife had a great idea to build a retaining wall to extend the space out another 6 to 8 feet! We had to move a lot of dirt to back fill the wall, but it worked out well. Later we will finish the other half of the wall and fill it too.

This wall created the perfect footprint for our new structure.

We had to drive metal stakes in the ground at each corner and every 4 feet in the middle and then cut them to the right height.

Is that straight? After the metal pipes were secured, I put the big PVC pipes over them.

Here's a picture of my wife consulting the book at this point to see what the next step would be. We got this particular style greenhouse idea from a great book by Jeff Ashton, called The 12-Month Gardener: Simple Strategies for Extending Your Growing Season. I plan to buy a copy because it also has a lot of great cold frame and cloche ideas. More on the book later.

After the PVC pipes were secure, we had to frame up the ends with 2x4s and add pipe supports to the wood and the PVC hoops. In the above picture, I am putting tape over the wire used to tie everything together in order to protect the plastic sheeting.

My daughters came out to check on the progress and decided to come on in. After the walls were finished and everything secured, we stretched and stapled the plastic on the end walls.

After the end walls were done, it was time to tackle the top plastic sheeting.

My wife and one daughter lifted it up to me while my other daughter took the pictures.

We got it put in place, used about 1,000 staples connecting it to the framework, and trimmed off the excess.

We finished just before the sun went down. At this point, the outside temperature was about 65 degrees. Inside the greenhouse it rose to 100 degrees! I still need to install an exhaust fan and get vent windows put together to control the inside temperature but I am encouraged by the fast temperature rise. I built insulated raised beds in half of this polytunnel and we plan to grow salad crops in there all Fall and Winter and then start many early plants in the Spring.

We have more to learn about how to care for plants inside a greenhouse, so any advice is welcome.

Happy Fall Gardening!

Thursday, October 2, 2008

October Greenhouse Creation!

That's right, I am building a greenhouse!

Many gardeners have put away the tools for the season, content to wait until Spring to ramp it back up. A few of my regular readers and friends have asked me if that is what is going on with me.

It's true that I haven't written much lately, but as for quitting garden activity - NO WAY, NOT ME! I have been extremely busy in the garden, planting many Fall/Winter crops and designing and building my very own Greenhouse.

It has taken about a month to gather all of the materials needed and get it framed in. Tomorrow I am taking a vacation day from my regular job so I can finish building it this weekend. I have always wanted to have a Poly tunnel or greenhouse but I didn't have room for one. My wife had an idea to build an enormous retaining wall and back fill it to create a space for a greenhouse. The digging took quite a bit of work!

Anyway, I will post a full report on it when it is complete. I just wanted to let you all know that I haven't disappeared and I surely haven't lost interest in gardening.

It has been getting cooler now and the Broccoli, Cabbage and Cauliflower that I planted in late Summer are doing really well. The lettuce has been excellent! Here is my wife and daughter harvesting some from one of the little beds:

When the greenhouse is finished, I will plant more lettuce and spinach inside it so we can harvest all winter long. I will tell you more about the greenhouse and my plans in a few days. In the meantime, its back outside with the tool belt. Wish me luck!

GardenDesk   © 2008. Template Recipes by Emporium Digital

TOP