Showing posts with label Garden Construction. Show all posts

Saturday, November 7, 2009

I want to build another chicken coop!

Our chickens are now giving us a good amount of eggs. We only have five hens and are averaging four eggs per day.

Organic_Eggs

Recently I posted an update on our chickens and the coop that we built for them. In that post, I told you that I love having chickens far more than I expected. We have never kept chickens before, so we started out small. Now I'm wishing that we had more but I only built a small coop. We could fit a few more birds in there, but the best option would be to build a 2nd coop. Last year I had trouble finding info on how to build a chicken coop so I made with without plans. It worked out pretty well, but I think I can build a coop faster with some good plans. Again, I've been searching for info on building an easy chicken coop, and I think I may have found it!

Its a ebook simply titled Building A Chicken Coop. It promises easy step-by-step printable plans for coops of all different sizes. It also covers things that are not as usual to find in chicken books such as what the cheapest and best materials to build with are. The first line of their promo sounds great: "Discover How To Easily Build An Attractive And Affordable Chicken Coop That  Protects Your Chickens From Predators,Maintains Their Health And Delivers More Delicious Eggs". Wow, that covers all of the important stuff! I'm excited to check this out.

I can't wait to build something new for the chickens so we can get a bunch more in the spring. In the meantime, our five are enjoying the new grazing pen I made for them.

Chickens_Grazing1


Chickens_Grazing2

My current coop will have to do until I have time to read Building A Chicken Coop and decide which coop plan to follow.

 
If you want to see for yourself more about the book I'm talking about, you can Click Here!

Hopefully we will have a mild winter and I can get started building a new coop before spring. I'll let you know how it goes!
Wednesday, October 14, 2009

Update on our Chickens and the Coop

I just realized that I have never posted about our adult chickens on Garden Desk! That's crazy because we absolutely love our chickens. I never knew how much fun they would be, and the eggs are delicious!
 
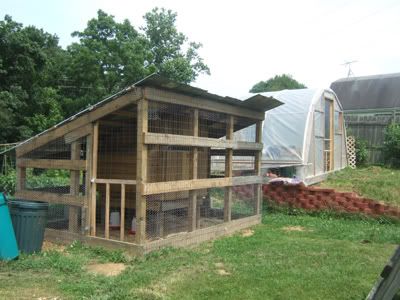
We did manage a post back in April about raising our chicks. We raised the chicks in our garage while we built our outside coop. We built the coop mostly out of wood that we already had from an old deck that I took apart a couple years ago. The coop construction took much longer than anticipated but they have been in it for three or four months now. here it is:


We were able to put it right in front of the garden and beside the greenhouse.

When we would read about keeping chickens, it seemed that many people let them roam around during the day. Around here experienced farmers were telling us to watch out for the many predators, some even during the day. We have to watch out for hawks, coyotes, foxes, raccoons, opossums, weasels, rats and the neighbor's dogs. Many people told us that we wouldn't be able to keep our chickens alive.

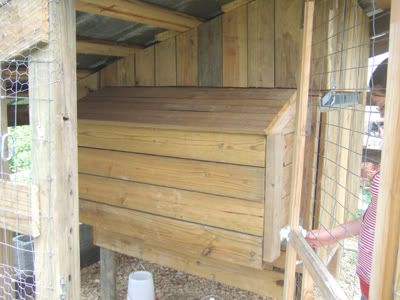
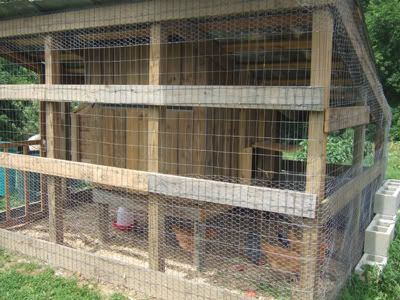
With this in mind, we tried to build a very secure coop. The building that they sleep in is in the very center, up on stilts with no outside walls. The small window openings have two layers of wire over them and we even put wire mesh down under the floor boards.


The rest of the coop is all under tin roofing with two kinds of wire around the perimeter. The wire is also buried in concrete at the bottom about 18 inches under ground! The door has a second latch about a foot off the ground so nothing can squeeze in.

If anything does manage to sneak in during the night, they shouldn't be able to get in the wood building. The chickens have a small door that they use during the day.


They go inside at dusk and then I lock their door.


Here they are coming into their building:


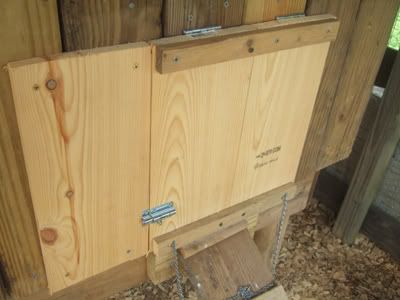
The other wall is hinged for us to get inside for cleaning. It also has the nest boxes built into it. When closed it also has a heavy duty latch. Here is what it looks like from the outside:


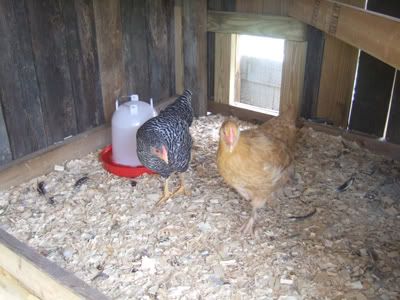
Here is the nestbox part of the inside:

 Nest Box

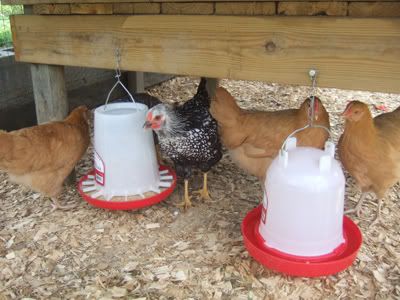
The chickens' main feeder and water hang from the building under the nest boxes.


All summer we fed them plenty of fruits and vegetables, an occasional worm or grasshopper and grass that we pulled. Recently, I thought they should get to graze in the grass on their own. In order to keep them safe while grazing, I constructed this crude grazing pen:

Grazing Pen1

I can lock them in if I want to clean out their coop, or I can connect the two units with portable chicken wire sides and top that roll out of the way when not in use. You can see what I mean from this angle:

Grazing Pen 2
 

The chickens love grazing in their new pen in the evenings. At nightfall, they go back inside to their roosts and I disconnect the pen and lock them safely in their coop.

The chicken coop and grazing pen are working out pretty well, especially since I built it without any real plans. The chickens have adapted well to it and are laying eggs almost daily now. As good as getting fresh organic eggs is, I think my favorite part about our chickens is that they are super friendly. They are more like pets than farm animals. They actually enjoy being held and get excited when they see us.

Pet_chickens

Raising chickens is great! As long as winter goes well, I hope to get more next spring. Of course then I'll have to build another chicken coop!

Thanks for reading!

Thursday, May 7, 2009

Finishing the Greenhouse Construction

I have had a couple of email questions about tomatoes and about how my extra-early tomatoes are doing. There was also a comment from Amber asking for an update on our Greenhouse. These are related topics because we will not have ripe tomatoes in May this year due to how slow I was in finishing the Greenhouse. Renee and I built most of it last Fall, but there were several things not completed that prevented the early tomatoes from going in there in time. The tomatoes are doing well and I will post specifically about them later. Its just that I don't think they will be ripe early enough to beat last year's record of June 5th.

The good news is that I finally completed the rest of the Greenhouse construction. The things left to do this Spring were:

  1. Install an exhaust fan and run electric to it
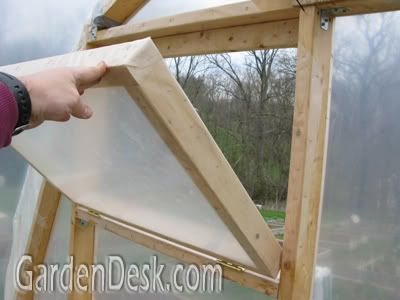
  2. Build windows to use as vents
  3. Build inside grow beds and fill with soil/compost
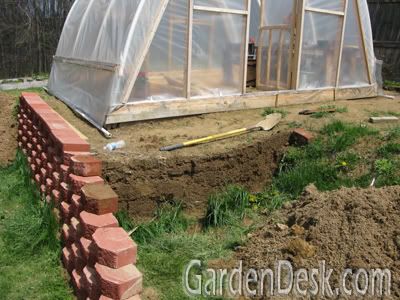
  4. Extend retaining wall and back fill for future greenhouse expansion

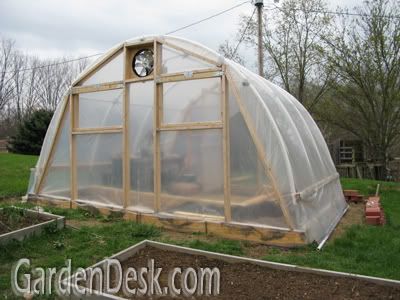
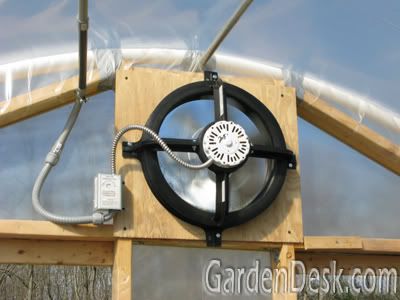
That proved to be a little too much to accomplish quickly, but it is now almost complete. The first item on the list was the hardest and the most important. Most people think that a greenhouse needs to be hot, and that is true during cool weather. The biggest struggle with a solar greenhouse is that in the Spring and Summer it can get TOO hot. This time of year is particularly difficult because nights are cold and sunny days get hot. With all of the vents closed up for the night, our greenhouse can easily get to above 120 degrees by mid-morning. The new exhaust fan is thermostat controlled to come on and expel the hot air in that scenario.

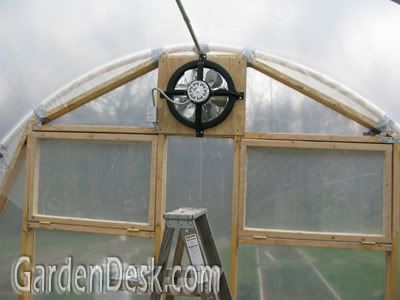
Here is a picture of our hoop house from the back where the fan is:

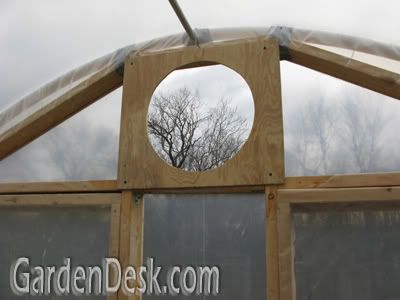
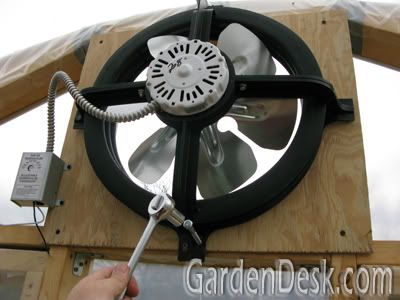
I was able to install the fan myself.


Getting the fan put in place was all I could do since I am not an electrician. Later I had an electrician friend come to run the electricity to the fan. In the meantime I set about completing the other items on the list.

I built the windows so I could have flexibility in how much venting to allow each day.

Then I built the raised beds along one side and along the back. This is not a requirement for all greenhouse structures but it was in the book  The 12-Month Gardener by Jeff Ashton, where I got the plans from and I think it will be a great way to grow lettuce and spinach all winter long.
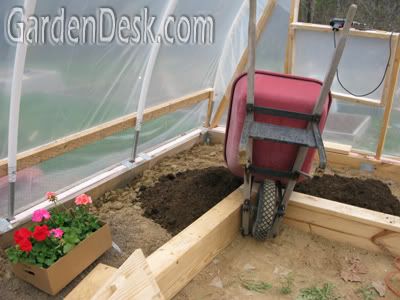
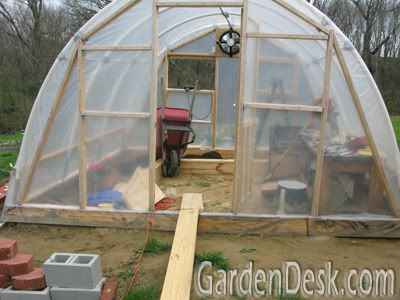
The hardest part was getting the wheelbarrow in to fill up the beds.

I was able to put boards down as plank ramps to go up and in.

I also had to tackle the retaining wall. The spot where we placed the greenhouse didn't naturally fit there. There wasn't enough space for it so we had to build a retaining wall and then fill in behind it with fresh dirt. Originally I wanted the greenhouse to be 14 feet by 24 feet. Since we had to move so much earth, we only built half of the wall and then built half of the greenhouse. Next year I want to expand to the full 24 feet so the rest of the wall needed to be put in and back filled.

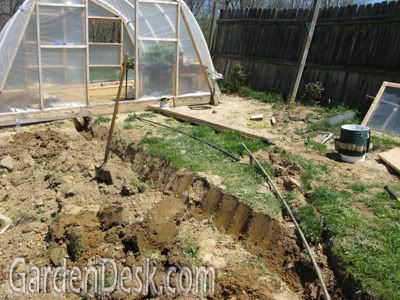
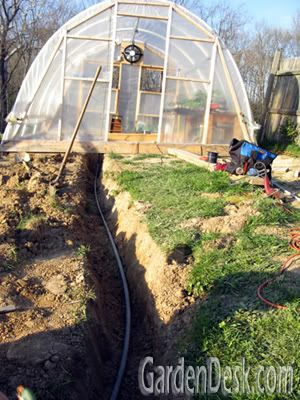
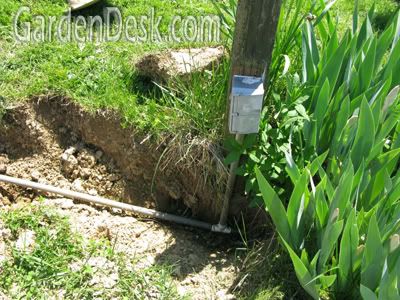
I moved about 50 wheelbarrow loads of dirt from the spot I dug out to fit the chicken coop in (more on that later). I forgot that we would need to run the electric through that space, so I had to dig part of it out again to make the trench for the electrician to run the pipe with electric wires in it.

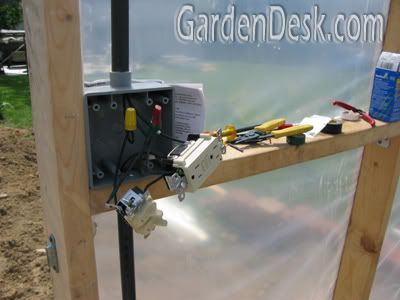
My electrical friend came over and did a great job with the pipe and the wiring.


He was able to splice in to an existing outside outlet that used to power a swimming pool pump.


He put in an outlet and switches to control a light that we will install later and the fan.


And finally, here is the fan working!


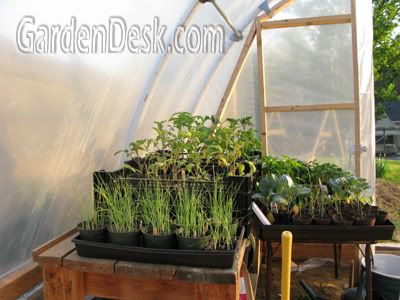
Now we can put plants in our greenhouse without worry of them getting too hot.


We may not have been able to use it much this spring, but from now on this greenhouse will grow thousands of plants for us. Our goal is to be able to harvest something from the garden in all 12 months of the year by leaning heavily on this structure in the winter. I'll show you more as we get it all going.

This greenhouse was a little more work than I thought it would be, but it feels good knowing that we built it ourselves from scratch with only a little help from our electrician and a lot of help from The 12-Month Gardener. What a great book that is!

Happy gardening!

- Marc

Tuesday, October 7, 2008

Greenhouse Almost Finished!

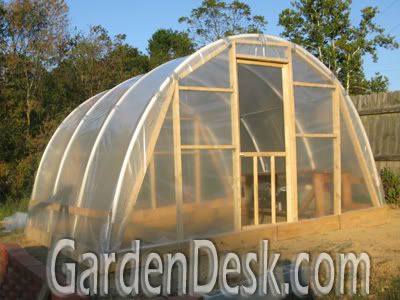
My wife and I literally worked all weekend to get our new greenhouse built.

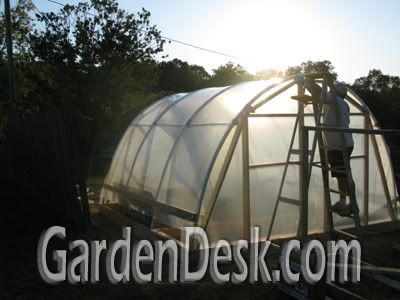
It was much more involved than I thought it would be. There is still a little more work to do but we are very excited to have the plastic completely covering it now. It is 14 feet wide and 12 feet long, but next year we will expand it to 24 feet long. I am calling it a greenhouse because the book that I got the idea from calls it that. Also, the plastic covering is called "greenhouse plastic". This kind of structure could also call this a poly tunnel or maybe even a hoop house.

Instead of explaining the whole construction process here, why don't I just show some quick pictures? Later I will write a more comprehensive "how to" post if anyone is interested.

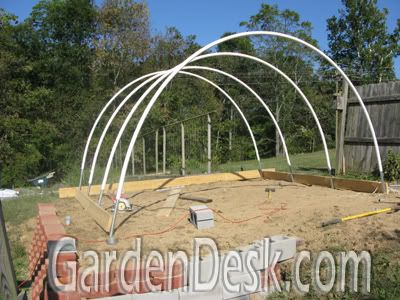
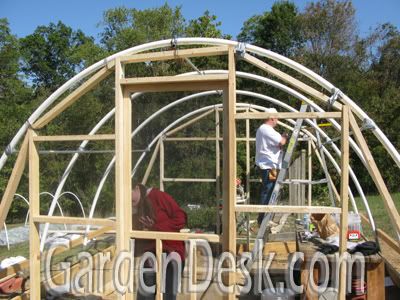
I think from the previous post, I left you here, with the PVC pipes being put in place:

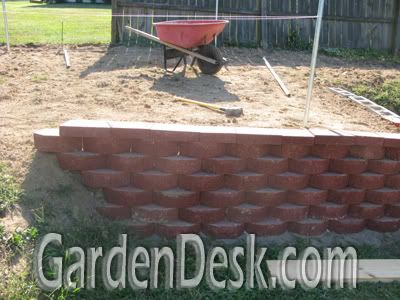
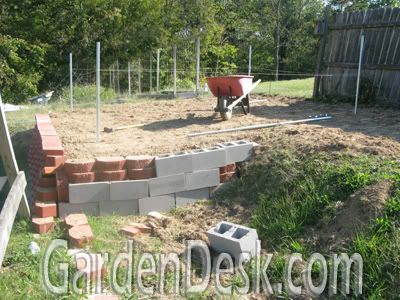
Even before that phase, we first had to make a spot to put the green house. We wanted to put it in front of the garden by the fence where the early tomatoes were last year, and the kid's garden was the year before that. This spot was too narrow so my wife had a great idea to build a retaining wall to extend the space out another 6 to 8 feet! We had to move a lot of dirt to back fill the wall, but it worked out well. Later we will finish the other half of the wall and fill it too.

This wall created the perfect footprint for our new structure.

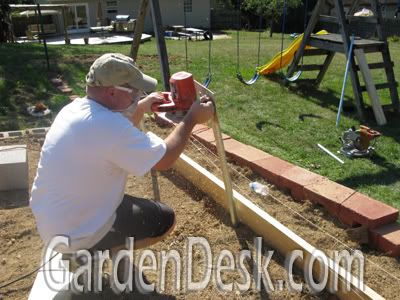
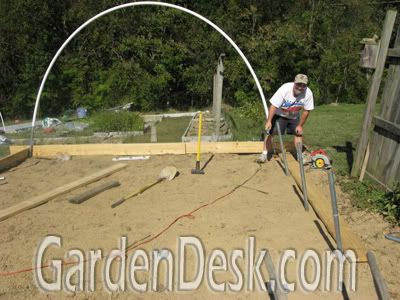
We had to drive metal stakes in the ground at each corner and every 4 feet in the middle and then cut them to the right height.

Is that straight? After the metal pipes were secured, I put the big PVC pipes over them.

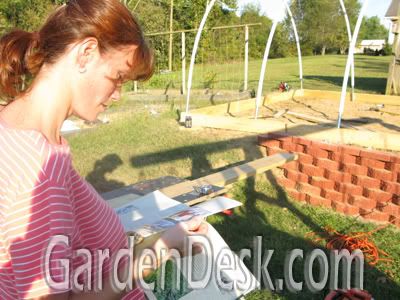
Here's a picture of my wife consulting the book at this point to see what the next step would be. We got this particular style greenhouse idea from a great book by Jeff Ashton, called The 12-Month Gardener: Simple Strategies for Extending Your Growing Season. I plan to buy a copy because it also has a lot of great cold frame and cloche ideas. More on the book later.

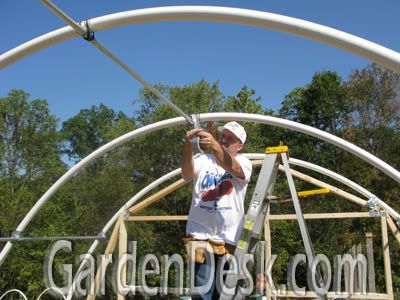
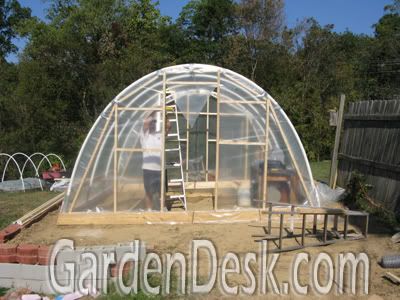
After the PVC pipes were secure, we had to frame up the ends with 2x4s and add pipe supports to the wood and the PVC hoops. In the above picture, I am putting tape over the wire used to tie everything together in order to protect the plastic sheeting.

My daughters came out to check on the progress and decided to come on in. After the walls were finished and everything secured, we stretched and stapled the plastic on the end walls.

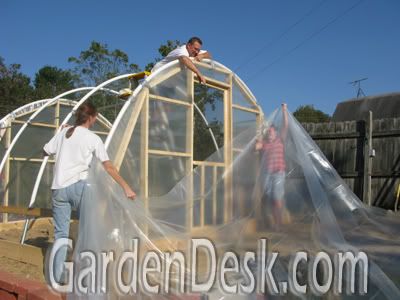
After the end walls were done, it was time to tackle the top plastic sheeting.

My wife and one daughter lifted it up to me while my other daughter took the pictures.

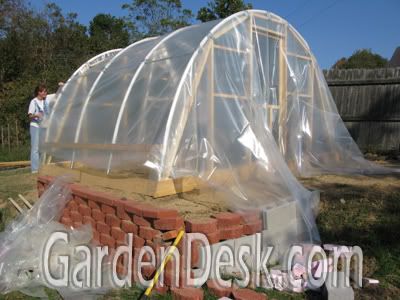
We got it put in place, used about 1,000 staples connecting it to the framework, and trimmed off the excess.

We finished just before the sun went down. At this point, the outside temperature was about 65 degrees. Inside the greenhouse it rose to 100 degrees! I still need to install an exhaust fan and get vent windows put together to control the inside temperature but I am encouraged by the fast temperature rise. I built insulated raised beds in half of this polytunnel and we plan to grow salad crops in there all Fall and Winter and then start many early plants in the Spring.

We have more to learn about how to care for plants inside a greenhouse, so any advice is welcome.

Happy Fall Gardening!

GardenDesk   © 2008. Template Recipes by Emporium Digital

TOP