Friday, March 28, 2008

How to Plant Leggy Tomatoes with the Trench Method

I wrote in my "how to grow healthy seedlings" post that you should be careful not to plant under the lights too early. My example was tomatoes. Kimberley from The Life of a Garden and some others have expressed concern now that their early-started tomatoes might get too big and leggy before planting time.

I didn't mean to scare anyone. If your tomato plants do get leggy, don't worry. You can always correct that at planting time by burying more of the stem.After the danger of frost in your area has passed, you should plant too-tall tomatoes very deep in the ground. This encourages adventitious roots to develop along the buried portion of the stem. Its also okay to snap off the lower branches if necessary.

If you can't get a deep enough hole, you can plant the tomato sideways in a trench and carefully bend it upright so the above ground portion is straight. Even if it isn't all the way straight, the plant will adjust itself later.

When planting this way, you can't even tell the tomato plant was too tall when you're finished. Look at how much taller the plants are in the cell pack than the one that from that same pack that was planted with the trench method.

Just be careful not to bend it so far that you snap it in two! Also, when watering it early on, remember where you buried the root ball portion on the plant.

Happy planting!

Thursday, March 27, 2008

2008 vegetable garden line-up!

Now that the regular season for Major League Baseball has officially begun, I guess it is time to introduce The 2008 GardenDesk Growers Baseball team!

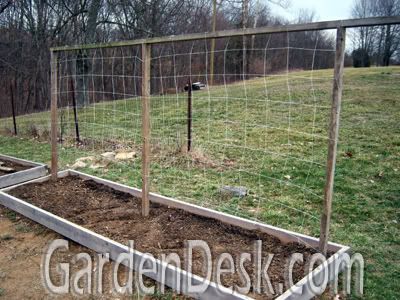
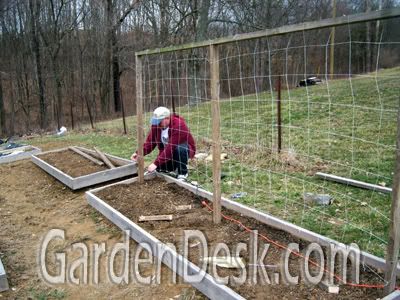
Okay, I know a garden is not a baseball team, but just like in spring training, I have spent a lot of time figuring out which vegetable varieties will make the cut this year. In addition to which particular varieties I will plant, I had to decide which vegetables needed to be cut (I just don't have enough room on the field!). Last year my total area for the veg garden was 25'x40', all in raised beds. This year I am expanding it to 40'x48'but the outside 15' will be planted in old fashioned rows. I have painstakenly tried to fit everything in using graph paper but I still don't have enough space.

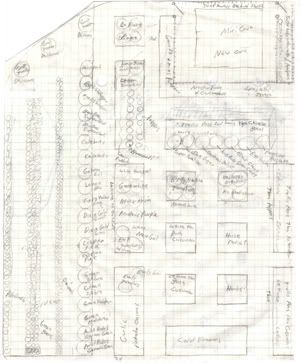
Sorry, I know you can't read the names listed on the graph paper. Just like last year, I have divided up the list into the following categories: Tomatoes, Cool Season, Main Season, Herbs, Decorations and Fruit. First I need to mention the veggies that I would like to grow but didn't make the cut.

This year's honorable mentions are: sweet potatoes, okra, leeks, beets and field pumpkins.

Now, the 2008 starting lineup

Introducing the GardenDesk Heirloom Tomatoes:

  • Aunt Ruby's German Green
  • Black Cherry
  • Black Krim
  • Brandywine
  • Brandywine (Glick's strain)
  • Caspian Pink
  • Delicious
  • Dixie Golden Giant
  • Egg Yolk
  • Furry Yellow Hog
  • Great White
  • Green Moldovan
  • Green Zebra
  • Kellogg's Breakfast
  • Kentucky Beefsteak
  • Pink Flamingo Ukranian
  • Principe Borghese
  • Prudens Purple
  • White Tomesol
  • The GardenDesk Hybrid Tomatoes:

  • 4th of July
  • Burpee's Supersteak
  • Celebrity
  • Early Girl
  • Golden Girl
  • La Rossa
  • Lemon Boy
  • New Girl
  • Orange Blossom
  • Park's Whopper
  • Roma
  • Siletz
  • Sub Artic
  • Introducing the GardenDesk Cool Season Players (many are already on the field!):

  • Potato Onions
  • Garlic
  • Peas
  • Broccoli-Green Goliath
  • Purple Cauliflower-Violet Queen
  • Radish-Cherry Belle, Easter Egg
  • Carrot-Short-n-Sweet, , Easter Egg
  • Swiss Chard-Five Color Silverbeet
  • Spinich-Space Hybrid, Melody Hybrid, Bloomsdale Long Standing
  • Head Lettuce-Summertime, Tom Thumb
  • Leaf Lettuce- Simpson Elite, Buttercrunch, Prizeleaf, Royal Oak Leaf, Lollo Rossa, Salad Bowl, Red Salad Bowl, Black Seeded Simpson, Mesclun Sweet Salad Mix, Pinetree Lettuce Mix
  • Oriental Greens-Komatsuma Tendergreen
  • Cabbage
  • And now for your Main Season GardenDeskers:

  • Corn-Mirai 301BC
  • Bush Green Beans-Tender Pick, Blue Lake Bush 274
  • Pole Beans-Kentucky Wonder
  • Cucumber-Park's Whopper, Straight 8, Burpee Bush
  • Squash-Vegetable Spaghetti
  • Zucchini-Ambassador, Longo Bianco
  • Onion-Red, White, Yellow Spanish
  • Potato-Kennebec, Russet Burbank
  • Bell Pepper-Park's Colossal Hybrid
  • Give it up for the GardenDesk Herbs:

  • Basil
  • Purple Basil
  • Oregeno
  • Chives
  • Thyme
  • Mint
  • Nasturtium
  • Horseradish
  • Next up, the GardenDesk Decoration Dudes:

  • Pumpkin-Jack Be Little
  • Gourds-Bird House Mix, Penguin, Assorted Gourd Mix
  • Sunflowers
  • And last but not least, the fruit selections:

  • Watermelon-Sugar Baby
  • Cantalope-Ambrosia
  • Strawberries-Cavendish and others
  • Blueberries-Jersey and others
  • Grapes (new)
  • Apples-Red Delicious, Golden Delicioius
  • Peaches
  • There will also be many annual flowers planted in the vegetable garden. This is my daughter's area and she has not given me her line-up card yet. I know there will be plenty of marigolds, cosmos, zinnias and morning glories.

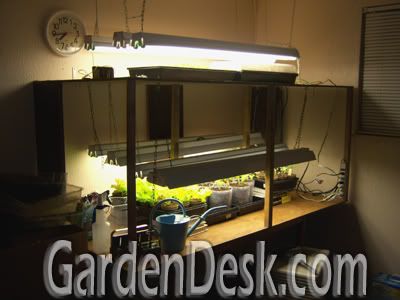
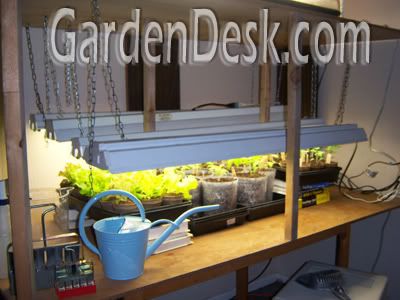
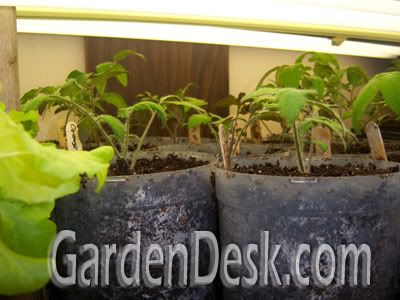
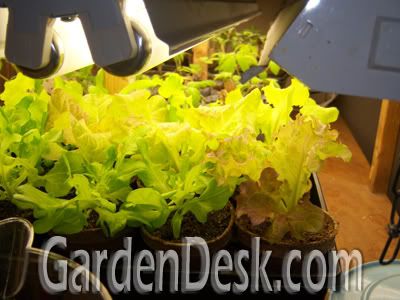
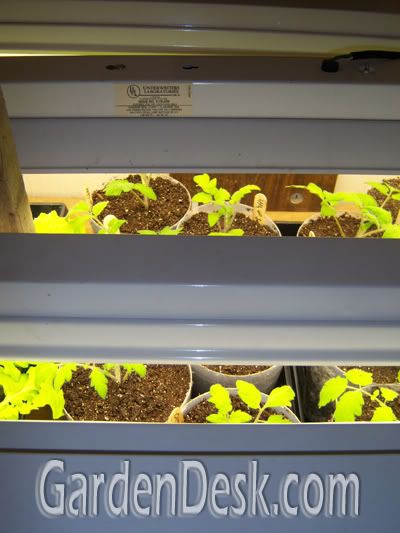
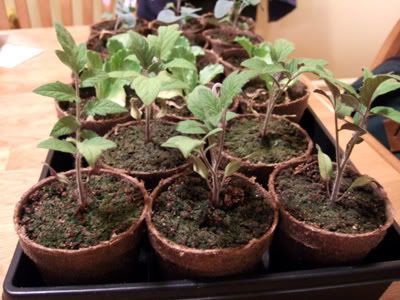
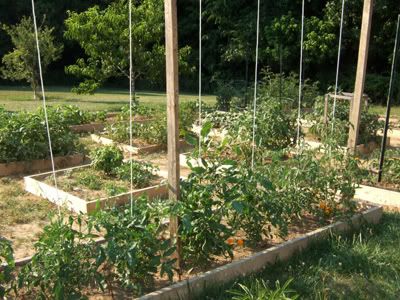
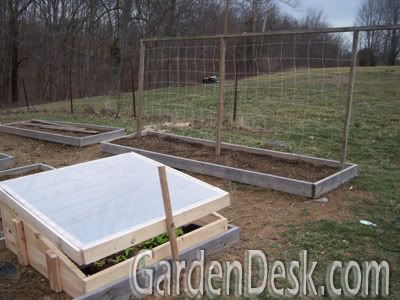
    And there you have it ... The comprehensive list of players for GardenDesk 2008! Several players are already on the field. Many players have begun warming up inside under grow lights. More will soon join them. Stay tuned for more updates on the pending season and players! Will they all actually get in the game? Will they hit a homerun, or will some strike out? Many questions will soon be answered.

    What does your 2008 "player list" consist of? What vegetables will you be growing that I have left off my list? Are you as anxious to get started as I am?

    Dum dum da dum da dum .... CHARGE!

    Tuesday, March 25, 2008

    How to grow healthy seedlings under lights

    There were several questions asked on my last early tomato post so I thought I should expound on what has worked well for me. I have grown most of my vegetables and annuals from seed under lights for years. I have made many mistakes along the way and have developed a system that works well for me. There are a few simple tips that I have learned that might be helpful to you.

    The five most often overlooked tips for growing successful seedlings:

    1. Use a lot of light!

    If you think your seedlings aren't getting enough light, you're right. And if you think they have enough light, they could still use more. With florescent light fixtures I am trying to mimic the bright and powerful sun, so the more the merrier. I like to have two fixtures per flat (four 40 watt bulbs). I don't use special light spectrum grow bulbs. They are an unnecessary expense. Although it is important to use new bulbs each year because the light bulbs lose some of their brightness as they age. I keep the lights on between 16 and 18 hours per day.

    2. Keep the plants close to the lights!

    I make sure the light fixtures are only an inch or so above the top of the plants. Remember, we are trying to give them the power of the sun, not the moon. Don't think in terms of how much light we need. I would rather err on the side of the plants touching the bulbs than too far away from them. Being too far from the bulbs causes tall spindly plants.

    3. Use good growing medium!

    I use the soil-less seed starting mix in the beginning and transplant up to a mixture of potting soil and peat moss. Do not use straight potting soil because it doesn't hold water well enough. You need the peat to keep the roots constantly watered.

    4. Give them plenty to drink with bottom watering!

    All of my containers have holes in the bottoms to allow water in (or out). Peat pots work the best for this. I put the cell packs, newspaper pots or peat pots in a plant tray that will hold water. Then I fill the tray up about half way and the porous soil medium wicks up the water to feed the roots. I water almost every day. I am convinced that this is where the most mistakes are made with growing seedlings. Constant light can dry out the soil quickly which stresses the plants. If you try to spray your plants from above, they probably don't get enough water. This is why I am struggling with using soil blocks. Since they aren't in a pot you can't bottom water them. I haven't used them for my early tomatoes. I will try again with the main season tomatoes.

    Incidentally, making sure my plants are watered frequently enough is why I don't use automatic timers to turn the lights on and off. If I have to do it manually I am more able to monitor the soil moisture.

    5. Get your timing right!

    Make sure you know when you plan to move the plants outdoors and the growth habit of each kind of plant you are raising. Research the recommended seed-to-transplant time for each vegetable or flower. For instance, tomatoes should only be under lights for 4 to 6 weeks before transplanting and you shouldn't transplant them until all danger of frost has passed. In my area, the average last frost is May 15th. That means that I should wait to plant the seeds of my 27 main season tomato varieties until mid-April. If timed correctly, you do not need to pot-up very often. Of course for my extra-early tomatoes I transplant them two or three times and have them under lights for 8 to 10 weeks but that is unusual. For most of my flower and vegetable seeds, I try to wait as long as possible. Real-estate under grow-lights is at a premium, even for a big bench like mine. Be careful not to take up unnecessary space by planting too early.

    Now, If you have never tried starting your own seeds indoors with florescent lights, I hope posts like these don't make it look too complicated. I love managing the plants under lights. For me it is great fun. It is especially rewarding because I know that I can truly raise organic vegetables. I get to control the plants' environment from start to finish. It is also fun to grow seedlings because you get a chance to get your hands dirty when it is still too cold to dig in the outdoor garden. I would recommend any gardener give seed-starting a try.

    Monday, March 24, 2008

    2008 Extra Early Tomato Update

    I often feel like I write too much about my tomato endeavors here, but I have been asked in a comment and in emails about the status of my extra-early tomato plants. If you agree that I write too many tomato posts, I apologize. Its just that there is a bit of satisfaction in trying to beat mother nature and coax something along to an early harvest. For me (and for those asking me to write this), that obsession lies with tomatoes! It is fun to get to eat a nice juicy organic garden fresh tomato a full month earlier than your neighbors. Its even more fun to have enough early tomatoes to share with you neighbors.

    So that is what I am shooting for this year. Last year I only grew two early tomato plants. This year I will have a lot more - at least 12. As of now, I have about 30 plants growing under lights. Last year, I raised only Early Girl tomatoes as my early variety. This year I am trying six different varieties. Last year my goal was to have ripe tomatoes by June 24th (my birthday), and got the first ripe tomato on June 15th! This year I am hoping for May 31st!

    So how am I doing? Is that goal possible? I'm really not sure. I do feel like I'm further behind than I should be. I started the first seeds on Valentine's Day and I stuck to my holiday theme by transplanting tomato seedlings yesterday on Easter.

    The problem is that I wasn't able to start all the early varieties at the same time. I only started Early Girl and New Girl on February 14th. They were transplanted to peat pots on February 28th. I started Orange Blossom and 4th of July on February 17th, but didn't get them transplanted to peat pots until March 10th! The last of my early varieties are Sub Arctic and Siletz. Those seeds didn't come in until late, so they were seeded on February 28th and transplanted to peat pots yesterday, March 23rd. Here is an example of the size difference between the plants transplanted on February 28th and the ones transplanted yesterday.

    Big difference. Originally I wanted to grow several different varieties to find out which one is the best early tomato. As you can see, scientifically I have failed all of the varieties except Early Girl and New Girl. They are the only ones that might still be on pace. For them, yesterday was time to transplant again. For this third step they get put into CD spindle covers that are about 7 inches deep. They need to have holes drilled in them first for drainage.

    These are great containers for this purpose because they are big enough in diameter and taller than a conventional 4 inch pot. This is great for tomatoes because each time you transplant a tomato plant, you want to plant it deeper than what it was in the pot it came from. You can bury the entire stem up to the first true leaves because roots grow from the buried stem which makes the plant stronger. Here is a before-after comparison of a plant in the peat pot and then in the CD pot.

    So am I far enough along to be fortunate enough to harvest before June 1st? That is two full weeks earlier than last year. Judging solely by my indoor transplanting schedule, I don't think I'm two weeks ahead of last year. Where I hope to make up ground is in the outdoor preparation.

    I have two raised beds from last year that I will be planting these early tomatoes in. I have put black plastic on the soil to begin warming it. I also plan to erect a frame down the middle of the beds to be able to drape 6 mil clear plastic over. The frame that I'm talking about will look just like the wood of my pea trellis. Later, I will use the wood frame to support the plants like my tomato towers from last year.

    But now I'm getting ahead of myself. Hopefully the plants will be put out by the middle of April. Our average last frost date is May 15th, so even with extra protection I will have to watch the weather.

    Is this all too much trouble just to reap ripe tomatoes a month or so early? Not if you are a tomato fanatic like me!

    I'll let you know more as it develops.

    Wednesday, March 19, 2008

    Time for Peas!

    Around here gardeners like to plan events in the garden according to Holidays. St. Patrick's Day is when they say you should plant peas, so I dutifully built my pea trellises and planted peas last Sunday (the day before St. Patty's Day).

    May Dreams Gardens is just a couple hours away from me and she planted peas on Sunday too.

    Maybe it's not just around here where gardeners shoot for pea planting on the Irish holiday because peas were planted in Skippy's Vegetable Garden on St. Patrick's day too.

    I also noticed that VegMonkey and Sustainable Garden have their peas up and growing already. I'm sure there are other bloggers who planted peas too.

    Building the pea trellises are a big deal to me because I haven't been this organized in recent years. I also bought new trellis netting that has the large squares. I used to love it and am excited to have it again. After the peas are harvested I will grow cucumbers on one trellis and pole beans on the other, using the same netting.

    I was able to "weave" the wood supports through the netting and I stapled the bottom part. Here is a picture that my wife sneaked of me finishing the first trellis:

    The bed behind me also received a trellis but it got dark before we could get a picture of them both.

    If you don't want to spend the money on pre-made trellis netting, there is a great post on Backyard Granger about how to make your own with twine. There is another great explanation on how to make a trellis with wood and twine from last year on Compost Bin. Maybe someday I'll use twine but for now I'm content to use the ready-made trellis material.

    I'm a bit proud of myself for building the trellis before I planted the peas. Usually I would go in reverse order and then "not have time" to build a trellis, leaving my peas a tangled mess with no support. So now I have built the two trellises and a coldframe. Here they are together:

    I love building garden structures. Next up? Something else I didn't manage to build last year - a fence to keep the coons out of my corn!

    Tomorrow is the first day of Spring! How exciting!

    Tuesday, March 18, 2008

    White Tomesol Heirloom Tomato: Excited, Upset, Exited!

    When I wrote last month about the heirloom tomato varieties that I plan to grow this year, the white tomatoes got the most attention. I had several emails and comments about White Tomesol in particular. I think it drew the most interest because it is really white. Many other white tomatoes are more of a pale green. I picked White Tomesol specifically because it is so white in color and I was excited to see how it grows.

    Finally I got my seed order from Baker Creek and wouldn't you know, there was a note that they were out of White Tomesol! They did give me my money back AND a free pack of Furry Yellow Hog tomatoes. Has anyone ever heard of Furry Yellow Hog?

    Anyway, what would I do about this? I already told everyone that I would be growing White Tomesol! After searching the net a while, I finally found another seed company in the US that had it - Amishland Heirloom Seeds. I placed the order and waited impatiently. Today, they arrived!

    In addition to the White Tomesol, I bought Glick's Brandywine from them. They also included a free pack of tomato seeds - Pink Flamingo Ukranian heirloom tomatoes. Of course I have to plant them too, but this is getting ridiculous! To recap, here is the list of the heirloom tomatoes I will be attempting in 2008 (in alphabetical order so as to not indicate favoritism):

    Aunt Ruby's German Cherry Aunt Ruby's German Green Black Cherry Black Krim Brandywine Brandywine (Glick's strain) Caspian Pink Delicious Dixie Golden Giant Egg Yolk Furry Yellow Hog Great White Green Moldovan Green Zebra Kellogg's Breakfast Kentucky Beefsteak Pink Flamingo Ukranian Principe Borghese Prudens Purple and of course, White Tomesol!

    To make my tomato growing production even more crazy, I will also be growing a number of hybrids. I love the heirlooms, but since there are pros and cons to growing them, I want to include some excellent hybrids too.
    To make the list complete, here are this year's hybrid tomatoes:

    4th of July Burpee's Supersteak Celebrity Early Girl Golden Girl La Rossa Lemon Boy New Girl Orange Blossom Park's Whopper Roma Siletz Sub Artic

    In case you weren't counting, that's 33 different tomato varieties. Yikes! I know I should edit some out, but I could tell you a good reason for all of these. I wrote about why I grow so many different tomatoes last year when I thought 20 varieties was a lot. In a nutshell, some of these are early types, some are cherry types, some regular types, some beefsteaks, some paste types, and of course we have the many different colors to aim for.

    I know, I know, call me obsessed. I wonder what my wife will say when I tell her that we are doubling the size of the vegetable garden to accommodate over 60 tomato plants.

    It's an addiction, I know - but won't the White Tomesol tomatoes be cool? (the original reason for this post)

    Sunday, March 16, 2008

    A much needed cold frame

    Today's high temperature was 55 degrees and tonight it will get down to 30. Exactly a week ago we got eleven inches of snow. By Thursday is was all melted and the thermometer topped 70!

    Last year, the end of March was pretty hot and then we got a week of snow and ice in April! The weather here in northern Kentucky in March and April is always unpredictable. So if you want to be successful early in the garden, you need a good cold frame!

    Years ago I had a good cold frame, but since I began intensive gardening again two years ago, I haven't yet managed to get another one. I wanted to make one last year but I was too busy with building the deck and with the vegetable garden re-design.

    So this is the year to build some new cold frames! This weekend I gathered up the needed materials for two cold frames and got to work!

    So how do you build a cold frame? My favorite cold frame design comes from one of my favorite books that I got back in 1988, called The New Victory Garden by Bob Thompson.

    It has been such a long time since I built one that I didn't remember how. Thompson spells out the exact plans for how to make a great 4x4 cold frame that can easily come apart for transport or storage.

    It is made with 2x8s or 2x10s. The top or "light" is simply heavy duty 4 mil or 6 mil plastic stretched over fencing. It is pretty simple to build, but it took me a lot longer to build the first one than I thought it would. Here is the finished product:

    The bad news is that I didn't have enough time to build the second cold frame. The good news is that now I know exactly how to build it. For the next one, I will take pictures of each step and post step-by-step instructions on how to build this cold frame. I will also write more about how to use a cold frame to harden off plants and how to grow vegetables in a cold frame.

    I know I haven't written in a while but I have been very busy preparing this years garden. I will be posting multiple times a week now. Spring is only 4 days away and the garden season is upon us! I want to share with you the pea trellises that I built and my 2008 vegetable line-up. I also want to tell you about the indoor worm bin and the outdoor vermicomposting system I'm starting this year. I need to update you on my early tomato growing efforts and plans for my Dad's memorial garden. Probably the most exciting new category I will be writing about is my new pond/waterfall water garden!

    There is so much to write so I will be burning up the keys. I hope you will come back soon to discuss all of this with me.

    Spring is almost here! Are you excited?

    GardenDesk   © 2008. Template Recipes by Emporium Digital

    TOP