Showing posts with label Potatoes. Show all posts

Wednesday, March 17, 2010

Planting Peas and Potatoes for Patty's Day!

Happy St Patrick's Day!

Here in Kentucky, instead of wearing green we can plant it! Green Peas that is. Local farmers also say planting potatoes is fair game on St. Patrick's Day. I don't know if I agree with either because in many years it stays really cold until mid-April. This year however I am going to take a chance along side my neighbors. Of course I can never garden exactly like regular folks so I'm planting the potatoes in the greenhouse beds.

Potatoes2

I may have overdone it a bit in buying 50 pounds of Kennebec Seed Potatoes, so I won't put all of them in the greenhouse. Later when I am no longer worried about frost, we plan to put the rest in the row-garden portion of the yard.

That is unusual for us because we primarily garden in raised beds which is where I planted the peas. The ground was still pretty wet last night which illustrates another reason why I love gardening in raised beds.

Last night I cleared out the bed closest to the greenhouse with a rake to make room for some peas. If I wanted to plant them in the regular ground as in a traditional row garden, it would have been way to wet to plant. I planted four rows of peas, each row on either side of a chicken wire fence.

Peas1

Later I will add more support poles to the chicken wire pea fences. It was very important for me to put the supports up before I planted the peas so I would know where exactly to place the rows.

Also, I usually have a problem planting tomatoes and things that need support because I plan to add the support later, but sometimes I don't get around to it. After doing this with half of my tomatoes last year, I vowed to ALWAYS put the support up prior to planting. So here is my quick pea supports.

Peas2

The other fun thing about preparing this pea bed was watching the chickens watch me. You can see the coop in the background on the right in the previous picture. I treated the chickens to an occasional worm as I turned over the soil. They were delighted!

Taking worms over to them gave my back a break every now and then. I'm not yet in gardening shape so even prepping one 4x12 raised bed wore me out. That's another reason why I like raised beds - you can work only a few beds at a time and still be very productive.

Later this week in the outdoor garden I hope to plant beds with broccoli, cabbage, lettuce and spinach. I think my pea bed is a pretty good start. I just hope they germinate well. Maybe by planting them on St. Patrick's Day I'll get the luck of the Irish!

Happy St. Patty's Day!
Tuesday, September 29, 2009

Easy Potato Harvest!

We grew a few different kinds of potatoes this year and in different ways. Recently we harvested our red potatoes which were grown in the most interesting way. This harvest was done with just my bare hands and I didn't even get very dirty! Here is one of the plants pulled up with the tubers underneath:

Potatoes1

 These were grown in a small cinder block raised bed. The growing medium was not dirt. It was a soil-less mix of peat moss, rice hulls and other organic material. Since this medium is so loose, you can harvest these potatoes by just reaching into to mix.

It is pretty hard to show you what I mean in words or pictures, so here's a first for GardenDesk - a video!

It really is that easy. My favorite thing about harvesting in this way is that it is easy to steal away new potatoes any time while they're growing. I didn't get a video of that earlier in the year, but below is a good simulation. Ignore that the plant has died back. This technique worked the same way while the plants were growing.

I just reached in every so often and took a new potato without harming the plant.

So if this mix is so great, why isn't my whole garden like this? First of all, it is a bit expensive. More importantly, The mix dries out quickly and is really hard to keep watered while the plants are growing.

I actually found this mix last year and thought maybe it would be good to have many beds like this. Before buying too much, I conducted a side-by-side test comparing this mix with my regular raised bed of garden soil, compost and peat. I grew one tomato plant, one pepper plant and four cucumber plants in each 4 foot square bed. Here were the results - this first picture is early in the season:

Raised_Bed_Test1 

At harvest time, it looked like this:

Raised_Bed_Test2 

My normal soil is on the left, the soil-less mix is on the right. Both sides yielded about the same amount of produce, but the new mix dried out too much. I think you can tell that the cucumber vines in the back were a bit smaller. So last year I was a bit disappointed with the new mix.

This year I began dismantling the cinder blocks but ended up keeping the new mix side of the bed. I planted the potatoes on a whim and now this mix has new value to me. I think I will reserve it for root crops from now on. Maybe I will move it into the greenhouse. 

Potatoes2

These reds are oh so delicious! For only 4 feet of growing, I can't complain with the amount we got, and harvesting as shown in the video is so easy. Forget the pitch fork! What fun. 

Wednesday, October 15, 2008

Garbage Can Potato Harvest!

I like to try new things in the garden. Every year I find new things to grow and new methods to try. One of the "experiments" this year was trying to maximize yield by growing potatoes in a garbage can. I have been receiving many questions about the status of these potatoes. Well, we finally knocked over the can to see if it worked.

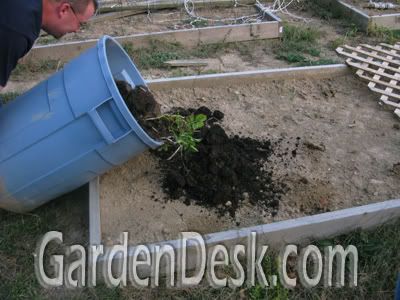
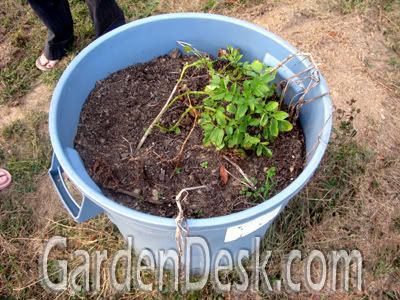
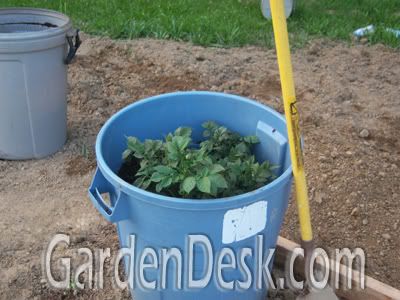
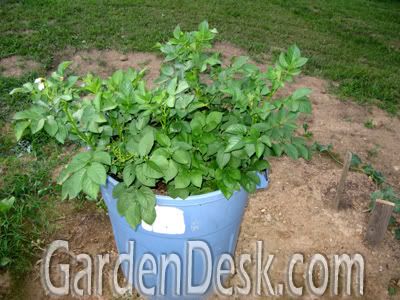
The idea is that you plant the seed potatoes down in the bottom of the can. As the plants grow, you fill more soil around them. Eventually, the can is filled to the top with soil and the plants are growing out of the top like this:

With proper nutrients and moisture, the potato plants send out new tuber growth all along the buried stems. The hope is that at harvest time, the garbage can would be filled with potatoes. You can see my first two posts about this idea here and here.

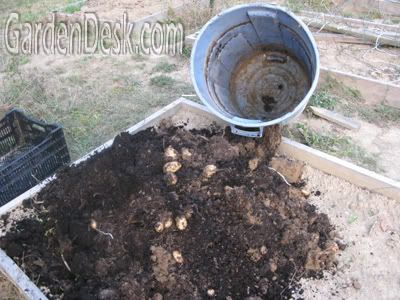
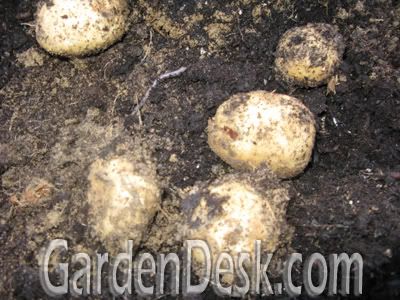
So it is finally time to harvest these garbage can potatoes. Here we go:

Wow, looks great doesn't it?

I could stop with the above pictures and say that everyone should switch to this method, but I won't. I always say that the purpose of this blog is to document happenings in my organic garden - to report what works and what doesn't.

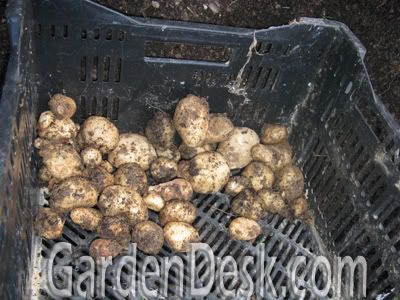
Writing about what works is more fun, but this potato can actually didn't work very well. Here is a picture of the complete harvest:

That's not any more than I would have gotten if I had just planted these potato plants in the ground. So what happened?

First of all, I had four or five plants growing out of the can in the first picture of this post. All but one plant died in July. This is what the can looked like before I knocked it over:

All of these puny little potatoes might have come from this one plant. The bigger problem I think I had was that the plants didn't get enough water. When I try it again next year (and I will), I think I should change my soil mix. This mix was mostly compost, peat and regular garden soil. Next year I will add sand and have much bigger drainage holes at the bottom of the can. I want to be able to water more often and more thoroughly without the worry of being too wet.

What about you? Do you have any ideas about how to make this concept work? I know it can work. We have done it before on a smaller scale. My daughter had success with this last year with potatoes in her garden bed by enclosing two plants with wood and raising the soil around them. I know other gardeners who have raised potatoes like this in tires and even in garbage cans. What is the secret? If you have had success with this, please let us know. I know I've read about this on other good blogs but I don't remember where. If you have posted about this, please share the link for us. And if you haven't written about it, but have had some success with potato growing like this, please give us some tips.

I'm sorry to say that I am not an expert on this yet (obviously), but together I think we can perfect this method. It does work - but how?

Sunday, June 22, 2008

Potato Plants to the top of the Garbage Can

There seems to be more interest in growing potatoes in a garbage can this year. I have seen several garden bloggers doing it. I don't remember them all, but my friends Tracy at Outside and Gina at My Skinny Garden both have good starts of potatoes in a can growing.

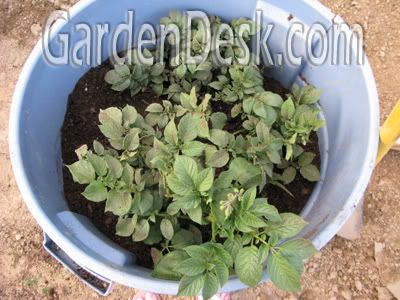
I am very pleased with the progress of my can-o-taters so far. The plants have reached the top of the can.

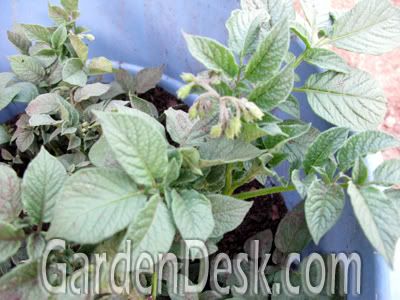
It has been easier this year because I had another can of good compost, peat and soil ready ahead of time. Last year I was always scrounging for some good growing medium. Soon I will add the rest of the soil mix and the can will be completely full. It will be good timing because the potato plants are beginning to bloom.

With this method, it is hard to rob the plant of "new" potatoes early in the season like I do with other planting methods.

With the garbage can potato method, I'll wait for the plants to die back, dump the can over and harvest a whole lot of spuds!

After the can is full of soil, the only thing for me to do for the rest of the summer is to be sure they stay well watered. Then its time for baked potatoes, mashed potatoes, home made french fries, scalloped potatoes, potatoes au gratin, hash brown potatoes .....

Tuesday, May 27, 2008

Potatoes in a Garbage Can?

I really enjoy trying new things in the garden. It makes my friends and neighbors consider my vegetable garden as "weird". For me though, the weirder the better. People think its odd that I grow white and black tomatoes, that I use strange methods for supporting those tomatoes, that I don't garden in rows and that I grow many things up tall trellises.

My new "weird" thing in the garden is growing potatoes in a garbage can!

This is not my original idea, but it is a great one. You drill a bunch of holes in the bottom of the can, fill it with a foot of good compost and soil and then plant the seed potatoes. You probably should only put four potatoes or cured potato pieces in the can but I over did it a bit.

Then you cover the potatoes, water well and watch 'em grow. When the tops get about a foot tall you add about six more inches of good soil to the can, burying the lower portions of the stems. Keep that up all summer and eventually the can will be filled to the top with soil and compost and the plants will be growing out of the top of the can.

More tubers will form all along the stems that you buried so at harvest time you will have a whole can full of potatoes! This is my first year trying this, but I know it will work. I have seen other gardeners do it successfully and I have applied this principle on a smaller scale before. For the past few years I have grown potatoes in a small raised bed and added extra wood sides and more compost as they grow. My 10-year old daughter even did this last year in her garden. If you don't want to have an ugly trash can in your garden and you, unlike me, don't want to be called "weird", you could at least try my daughter's wood box around the potatoes idea. You could probably even add it to some of your existing potato plants.

As for me, these aren't the only potatoes I'm growing but I am looking forward to playing with my ugly blue potato can at the end of the garden. I planted them a few days ago and now they have sprouted!

Weird gardening is fun.

Monday, April 7, 2008

Vacations are hard on the garden!

Here's an obvious fact: you can't work in your garden while you're on vacation. I have often realized that after returning from a Summer vacation, so this year we took an early Spring vacation. Leaving on March 30th for a week or so, I thought would be a great time for a vacation. After all, not much is going on in the garden yet. Of course I only thought that until we returned. We had a great time on vacation visiting my brother and family (I have a new baby nephew!) and even getting away for a quiet night alone with my wife, but I have soooo much to do now.

Yesterday I worked all day in the yard and garden and I journaled about it the old fashioned way - on paper. Soon I will convert that to these electronic pages to document how things are going with my peas, garlic, potato onions, lettuce, early tomatoes etc.

While on vacation I didn't entirely leave the garden behind. I found a great little old fashioned general store in the mountains of Kentucky with cheap seeds and seed potatoes. I bought more peas, beans, onion sets and 40 pounds of seed potatoes - so now I have even more to do!

I bought some Red Pontiac and Irish Cobbler potatoes. Hopefully I will get them planted this week! The weather is great now and Spring is springing - how exciting!

So this is just a quick post to let you know that I haven't abandoned Garden Desk or my garden. Quite the opposite is true. Stay tuned for more....

Saturday, June 30, 2007

A Potato Green Thumb Sunday Update

Have you ever heard of growing potatoes in tires? You fill a tire full of garden soil and plant a few potatoes. After the plants get to be about two feet tall, you add another tire on top of the first one and fill more compost or soil around the potato plants up to the top of that tire. When the potato growth gets taller again, you add another tire and more dirt. I've seen people get up to five tires high! The potato plant amazingly makes more tubers along what was originally the above ground part of the plant.

Well, I don't have any extra tires to do this with and I think that would be a bit ugly anyway. However, the idea is a sound one so I am attempting to repeat the concept using boards to make my raised beds higher and higher.

I have Kennebec and Yukon Gold potatoes tightly spaced in the raised beds so I can do this. last year I tired this with some success, but the beds were too large. It takes a lot of extra soil to raise 20 square feet even one foot higher.

This year I planted them in beds 4 foot by 3 foot, and 4 foot by 2 foot, so I could more easily add more wood and soil to the beds. Unfortunately, that is STILL too big of an area.

By accident however, I discovered the perfect size bed for this technique - about 2 foot square.

My daughter planted only two seed potatoes in the corner of her garden bed. I then built up that portion of the bed with wood stakes and boards. As the potato plants keep getting taller, we will add another layer of boards and fill that in with more soil. By the time we are done, the "box" will be almost three feet tall.

What makes this even better than the tire idea is that we can take off some of the lower boards to harvest "new potatoes" any time we wish because the first tubers that are produced are at the bottom and as long as we keep making the box taller, the plant will keep producing!

Ironically, since I won't be capable of making my larger potato beds very high, my daughters 2x2 potato bed will out-produce my 4x3 beds. Next year we will make several small bed/boxes like hers. My daughter has really been teaching me about gardening this year without even trying. When it comes to these potatoes, good thing she has a green thumb!

Join Green Thumb Sunday
Join

Don't forget to visit other Green Thumb Sunday participants too!

Friday, August 11, 2006

Diggin' For Gold!

Digging potatoes for the first time feels like you are uncovering buried treasure, especially for kids. Even more so when you plant "Yukon Gold" potatoes. This is the first year we've planted potatoes and it was very successful. In our garden as a kid, digging potatoes was hard work because they were planted in our hard Kentucky clay soil. I read on some other blogs in May about growing potatoes in barrels or in a stack of tires to make harvesting easier. I didn't do either, but I used the spirit of the idea.

I started with only 10 seed potatoes, cut them in half and planted the 20 pieces in a 4 foot by 5 foot section of one of my beds. The compost pile was in that spot the previous year, so the soil was great. As the plants grew, I kept adding good dirt and added a 2nd and 3rd landscape timber layer making the bed even more raised. I had planned to keep getting higher and higher like you would growing them in tires, but I ran out of good soil. The plants make potato tubers all along what once was the stem of the plant if you keep burying the stem. When it came time to harvest, it was easy to get a shovel in and under the potatoes. A few times we harvested them small to add to a roast or something. When we did this we could just reach our hand down in the dirt and find a potato without disturbing the plant. Good loose soil is key! For the rest of the plants, we waited until the tops died back and the potatoes were pretty good size. We got several big bowls full of potatoes in just a small amount of space. Look at the potato in the picture below next to the quarter as reference:

I definitely recommend the barrel or tire method. If any of you have written about this or know someone who has, please let me know and I will link to it.

Next year I will grow a lot more potatoes so we can dig for more gold! The flavor of Yukon Gold is excellent too. They are a yellow color even after they are cooked. I bought mine from PineTree Garden Seeds, which is my favorite seed company. They also have "Red Gold" potatoes if you want to stay in the pirate theme!

Friday, August 4, 2006

What a Great Harvest!

Wow have we been blessed with a great harvest so far! The garden is exploding with tomatoes, potatoes, cucumbers, onions, zucchini and green beans.

We have been busy picking everything, making pickles and salsa, and freezing green beans. My daughters have been great about picking and snapping the beans.

We have been having a lot of fun with the harvest. We are still waiting on the corn and melons, but everything else has been doing well. The only thing not doing well are the carrots. We allowed the cantaloupe to take over the carrot and radish beds because I never put up the trellis that I was planning to build.

I hope your gardens are doing well. Sorry that I haven't posted in over a month. I have much to tell you and lots of pictures. I will try to get back to posting often. I want to tell you about what happened with the baby robins, and how the tomato supports have done. I have some interesting bugs to show you, some funny canning stories and much more. Check back frequently! Until then, blessings to you all.

GardenDesk   © 2008. Template Recipes by Emporium Digital

TOP