Showing posts with label Season Extension. Show all posts

Friday, July 10, 2009

Eliot Coleman's new book!

Wow, a lot has been going on with my family and in the garden lately. I have many many posts to share with you to catch up, but first let me show you my birthday present from my wife and daughters.

Winter_Harvest_Handbook1 

Its Eliot Coleman's new book - The Winter Harvest Handbook. Officially the title is:

The Winter Harvest Handbook: Year Round Vegetable Production Using Deep Organic Techniques and Unheated Greenhouses

The subtitle is important to me because that is exactly what I am hoping to do this year. Our new greenhouse is ready to grow veggies all winter long!

This was a great birthday surprise because I didn't even know Eliot Coleman had a new book out. It was just released. As you may know, Eliot Coleman is my very favorite gardener and garden author. His other two books, The New Organic Grower and Four-Season Harvest are on my list of 25 favorite gardening books.

I can't wait to read more of The Winter Harvest Handbook. So far, I can tell that it is packed with even more of Coleman's wisdom. He outlines the way he accomplishes growing so much organic produce, all year long.

Winter_Harvest_Handbook2  

This book was only part of a fantastic birthday week. I have been able to spend some extra time with my family, we are eating tomatoes, peppers and onions from the garden, and we finished building the chicken coop! My hours at work are changing which should allow for more time in the garden and for blogging. Hopefully, I will get pictures on soon of the chickens and the garden and get back to regular blogging.

Happy gardening everyone!

Sunday, February 22, 2009

Step by Step How to build a Cold Frame

Last year I posted about the new Cold Frame that I built and I was asked to write a more detailed how-to post. I bought the materials to make another one, but never found time to build it... until now.

Last year's cold frame looked like this:
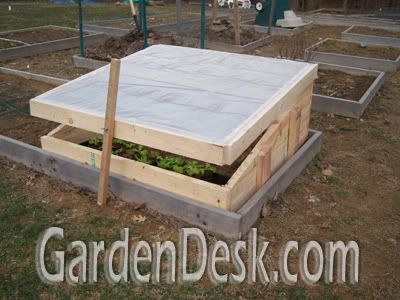
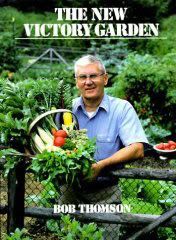
It was basically a 4'x4' cold frame built by following the plans from one of my favorite books called The New Victory Garden by Bob Thompson.
The new cold frame I built was created in basically the same way but instead of the traditional 48" in depth, I made it 40" so it will fit the raised bed in my new greenhouse. That's the beauty of building your own cold frame - you can tailor make it to fit your needs.

The New Victory Garden was written way back in 1987. It was the first vegetable gardening book that I bought and I learned a whole lot from it! It truly was instrumental in my obsession with veggie gardening. There are many great things in the book including easy to follow plans for how to make a coldframe. I will attempt to explain the steps involved in the remainder of this post, but I'm sure I won't be able to do it as well as Thomson. Let's start with the materials needed:
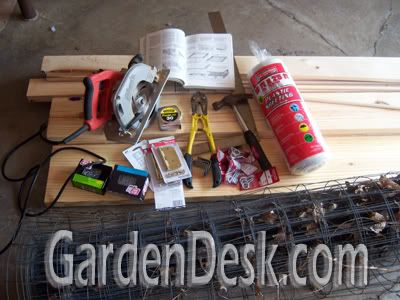
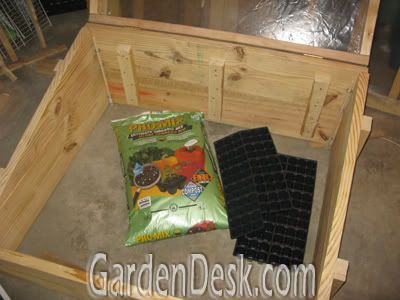
All you need are some tools, exterior nails or screws, two hinges, a 4' piece of good plastic sheeting, 3 - 8' 2x6 or 2x8 untreated boards, two 8' 2x4s, two 8'a 4' piece of wooden dowel, 10 feet of 1x3" lumber and some furring strips. I'm sure I missed something in that list, but we will go over each step below:

Begin by cutting the 8' 2x8s in half to create six 4' boards:
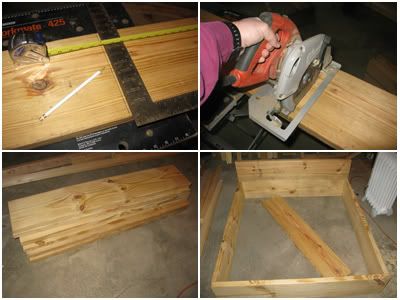
The boards will basically be arranged like the last panel of the above picture. 4 boards make a box for the bottom layer. One more board goes on top in the back, and the last board gets cut diagonally for the sides.

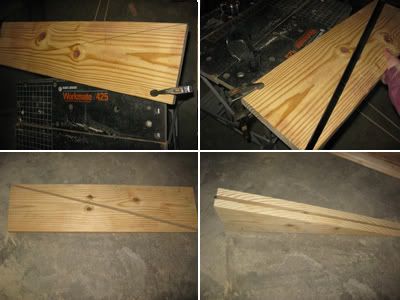
This is probably the most difficult part of the whole process. Draw a line from one corner to the opposite corner and cut down the line. The way I accomplished this was to clamp it to my table. After the cut is made, you should have two identical diagonal boards.
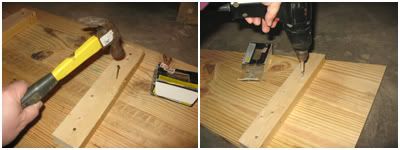
Next, attach each diagonal piece to one of the side boards with small pieces of the 1x3s. Do the same with the two 4' boards for the back. You can use exterior 3" screws or galvanized nails. I used some of each.
Now that the back and sides have been created, we have to attach them. This is one of my favorite features of the Victory Garden's plan. If you simply nailed the sides together, you would have to build the frame in place because the entire unit would be too heavy to move. This design allows you to easily take apart the frame to move it around or store it.

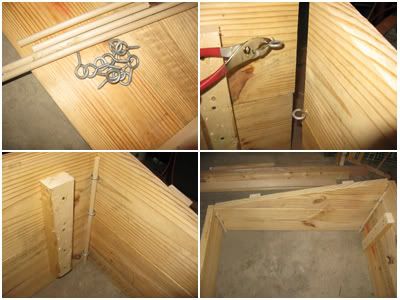
Each corner is attached by using galvanize eye screws and wooden dowels. You alternate the eye screws in the corners and then slip the dowels in.
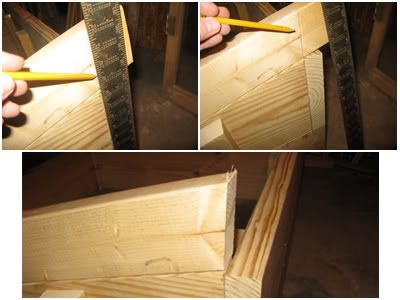
Next you build the lid or top of the frame that will be hinged to the frame using 2x4s. The front and back is made from 4' pieces and the sides from whatever length you are making (this frame needed to be 40" total front to back length, so the side pieces were 37"). The most difficult part of this is that the sides need to be cut at an angle so the lid fits securely. The easiest way to do this is by lining up a straight edge with the boards below.
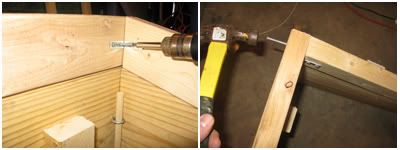
The 4 lid pieces are then attached by nailing through the ends. You might find it easier to use an "L" bracket to line up each corner first.
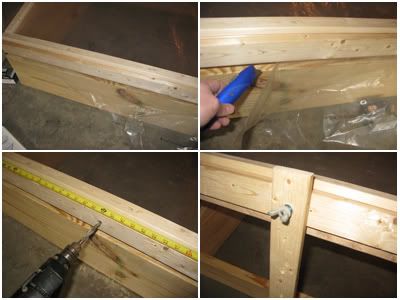
After the lid is solid, you can attach it to the frame with hinges. Then you can add plastic to the top by stapling it down and nailing furring strips over the plastic.
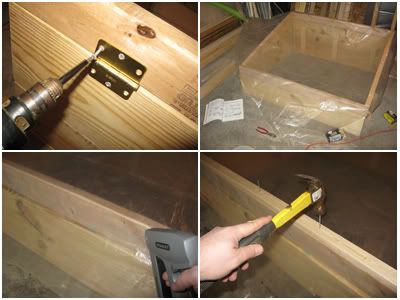
The thicker the plastic sheeting you use, the better. I used 6 mil greenhouse plastic for this one. Last year I just used plastic from the hardware store and it was probably 4 mil. The book calls for wire fence to be put down first before the sheeting is attached. I did this last year, but didn't think it was necessary for this one. If you do use fencing beneath the plastic, use "U" nails to attach it to the top of the lid.
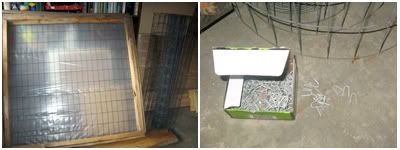
We're almost finished with our new coldframe now! After you've nailed down the furring strips over the edge of the plastic, trim the excess plastic away. Then you need to measure the middle of the front and drill a hole in it. This will be used to slip a carriage bolt through to attach a post that will allow you to vent the frame when needed.
My finished cold frame looked like this:
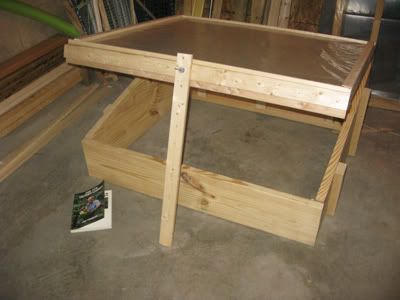
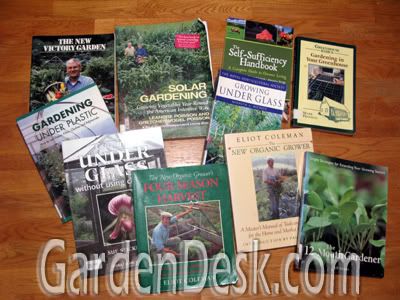
All ready to be taken outside and put in the greenhouse. It will soon house tender young plants to help me get a jump on the growing season. If you want to know more about the uses of a cold frame, see my post on Simple Green Frugal Co-Op or visit the library and get some books about it. There are many books available that include ways to use cold frames for season extension. Among my favorites are Four-Season Harvestby Eliot Coleman, Solar Gardening, Growing Vegetables Year Roundby the Poisson's, Gardening Under Plasticby Bernard Salt, and my new favorite where I got our greenhouse plans from - The 12-Month Gardenerby Jeff Ashton.

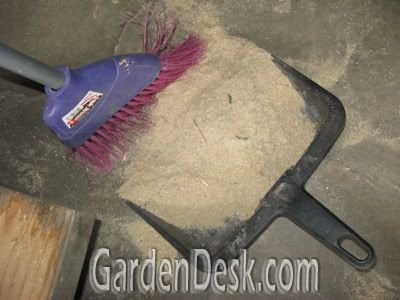
Now I just have to do more seed sowing! Oh, I almost forgot to mention the final step in building a cold frame - sweep up the saw dust and add to your compost pile :)

Wednesday, November 26, 2008

Garden Fresh Thanksgiving Produce!

I finally reached a goal that I have been striving for - fresh organic vegetables from the garden for Thanksgiving. The stoop houses worked and I picked loads of broccoli and four heads of cabbage a couple days ago. I know those aren't traditional Thanksgiving veggies but fresh coleslaw and broccoli casserole will go nicely with potatoes from the garden, turkey and all the other trimmings.

We have had an unusually cold November this year. It sure was strange picking from the garden the other day when it was only 12 degrees Fahrenheit outside!

Look at the ice buildup on our newly constructed greenhouse:

The greenhouse is not any warmer inside than outside because I never finished building the vents. Right now the bottom 2 feet along the sides are still exposed and there are several opened windows. I need to fix that soon so I can use the greenhouse this winter and early spring.

Luckily the temperature under the small hoop houses is higher than in the greenhouse and the outside. It has stayed warm enough to keep the broccoli and cabbage from freezing.

See the water droplets on top of the broccoli? Those are actually little beads of ice.

The only casualty under the stoop houses was the lettuce. It still looked good, but after picking it and bringing it inside, I could tell that it had been frozen. For lettuce harvesting now, we will have to turn to our indoor lettuce growing under lights.

It is a little extra work keeping the garden going in the Fall and in the cold, but its worth it! I've got cabbage and broccoli ready to be prepared tomorrow along with the other Thanksgiving goodies!

Happy Thanksgiving everyone!

Thursday, October 9, 2008

Why we built our poly tunnel hoop house

I have wanted to have some kind of a greenhouse for the past 15 years but to buy a pre-built greenhouse that is big enough to turn around in costs many thousands of dollars. We have found that with many home improvement projects, it is much cheaper if you can do it yourself. So for the past year or so, I have been researching how to build your own greenhouse. I read many books and magazines and these are my favorite books about building a greenhouse, hoop house or poly tunnel and how to use them after they are built:

Some books speak only of how to use a greenhouse structure but the best are those that teach all of that AND a way to actually construct a hoop house. Through my long search, I have whittled the books down from dozens to my favorite four. They are Four-Season Harvestby Eliot Coleman, Solar Gardening, Growing Vegetables Year Roundby the Poisson's, Gardening Under Plastic by Bernard Salt, and my new favorite where I got our greenhouse plans from - The 12-Month Gardenerby Jeff Ashton. These four books convinced me that I MUST have a greenhouse.

Using row covers, cloches and cold frames for a few years showed me that I could extend the growing season in the Spring and Fall. A Poly Tunnel is one step further in that direction. Consider what Eliot Coleman's wife Barbara Damrosch wrote in the Forward of his book. Damrosch is an expert in her own right and I love the way she writes. After explaining the harsh conditions that each season hits the gardener with, she says how we can overcome those things with cold frames and a hoop house. She writes "Imagine, instead, a scenario in which spring work begins more gradually, summer spares time for other outdoor pleasures, fall is a gearing-up rather than a giving-up, and winter, best of all, is a time to reap a fresh harvest with almost no work." Yes, Barbara, that is what I want! And with the tough economic times we are in, my family needs to grow much more of our own food.

Speaking of economics, what did our greenhouse cost? We put much more wood in the end walls than you have too, which raised our cost. Even still, I got all the materials for a 14 foot by 24 foot greenhouse including an exhaust fan and professional greenhouse plastic for around a thousand dollars. It probably could have been done for much cheaper but we wanted a permanent structure. (The dimensions of our greenhouse in the previous post are 14x12, not 14x24. We will build the 2nd half next year after the retaining wall is constructed.)

The design we used from Jeff Ashton's book originally came from an organic farmer named Steve Painter. Painter built his greenhouse in 1970 and other than changing the plastic and a little maintenance, the structure is still the same to this day! How's that for permanent?

Okay, so exactly what can you achieve with a poly tunnel? Bernard Salt lists many advantages in Gardening Under Plastic.He says spring is 6 weeks early and winter is 4 weeks later, bedding plants are grown very cheaply, half hardy perennials survive the winter, flowers are not damaged by wind storms, animals can not get to the crops, tender crops are more easily grown, and rain doesn't stop the gardener from gardening.

Eliot Coleman states that putting a layer of protection over a crop is like moving that spot a growing zone and a half warmer. For me that means our tunnel takes us from zone 6 to zone 7.5 (if there were such a thing). What's beautiful about this is that I plan to have a smaller plastic covered hoop over the inside growing bed, which will take that bed to zone 9. We're talking Florida temperatures here in Northern Kentucky! That's why I'm hopeful that we can keep things growing in the winter.

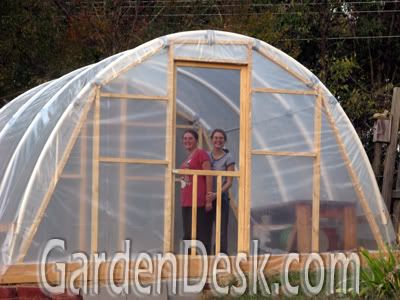
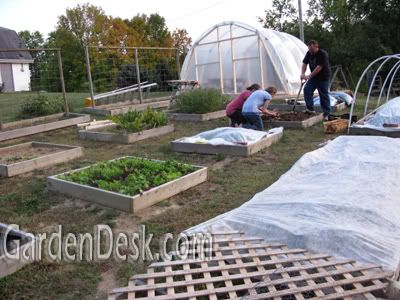
Since we just built our greenhouse and haven't been able to see any of these benefits yet, here are my two favorite things about it so far; My daughters really like it...

and it looks really good next to the garden.

Here we are digging potatoes with the hoop house in the background.

By the way, we finally tipped over our potato garbage can so I will be writing about it soon. The girls had fun with that too. It is so great to garden together as a family!

Tuesday, October 7, 2008

Greenhouse Almost Finished!

My wife and I literally worked all weekend to get our new greenhouse built.

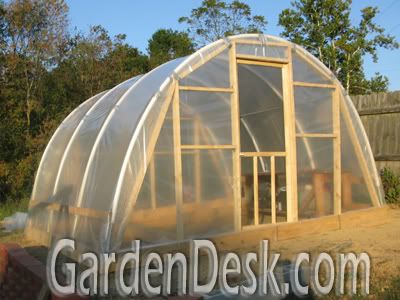
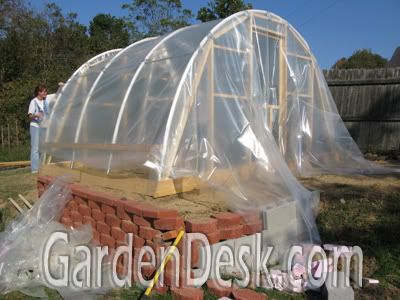
It was much more involved than I thought it would be. There is still a little more work to do but we are very excited to have the plastic completely covering it now. It is 14 feet wide and 12 feet long, but next year we will expand it to 24 feet long. I am calling it a greenhouse because the book that I got the idea from calls it that. Also, the plastic covering is called "greenhouse plastic". This kind of structure could also call this a poly tunnel or maybe even a hoop house.

Instead of explaining the whole construction process here, why don't I just show some quick pictures? Later I will write a more comprehensive "how to" post if anyone is interested.

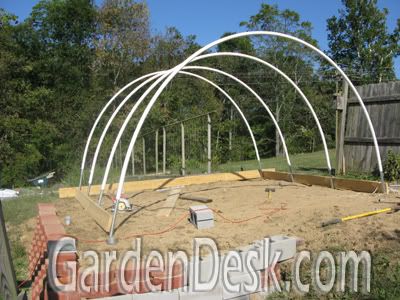
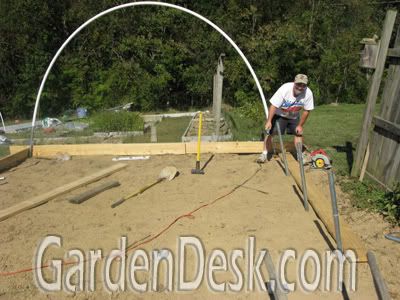
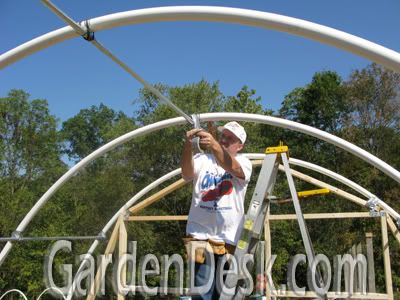
I think from the previous post, I left you here, with the PVC pipes being put in place:

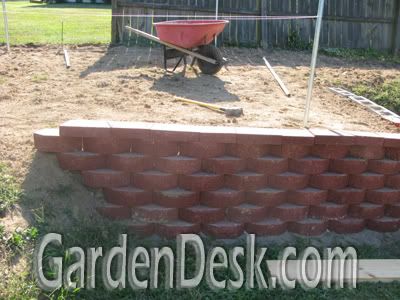
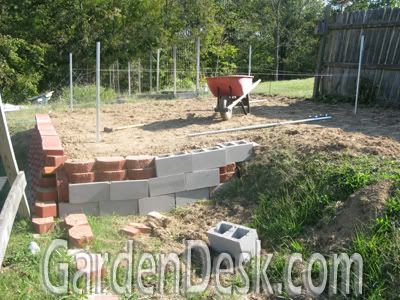
Even before that phase, we first had to make a spot to put the green house. We wanted to put it in front of the garden by the fence where the early tomatoes were last year, and the kid's garden was the year before that. This spot was too narrow so my wife had a great idea to build a retaining wall to extend the space out another 6 to 8 feet! We had to move a lot of dirt to back fill the wall, but it worked out well. Later we will finish the other half of the wall and fill it too.

This wall created the perfect footprint for our new structure.

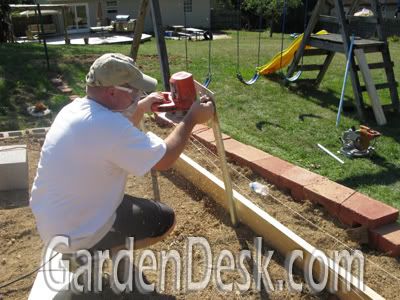
We had to drive metal stakes in the ground at each corner and every 4 feet in the middle and then cut them to the right height.

Is that straight? After the metal pipes were secured, I put the big PVC pipes over them.

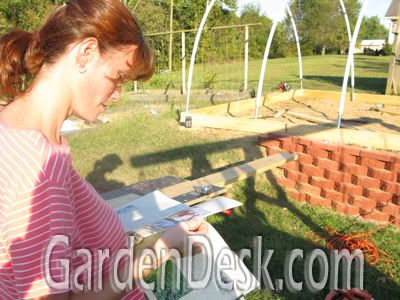
Here's a picture of my wife consulting the book at this point to see what the next step would be. We got this particular style greenhouse idea from a great book by Jeff Ashton, called The 12-Month Gardener: Simple Strategies for Extending Your Growing Season. I plan to buy a copy because it also has a lot of great cold frame and cloche ideas. More on the book later.

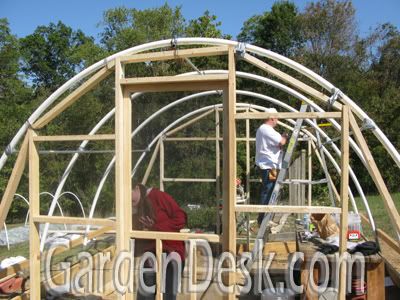
After the PVC pipes were secure, we had to frame up the ends with 2x4s and add pipe supports to the wood and the PVC hoops. In the above picture, I am putting tape over the wire used to tie everything together in order to protect the plastic sheeting.

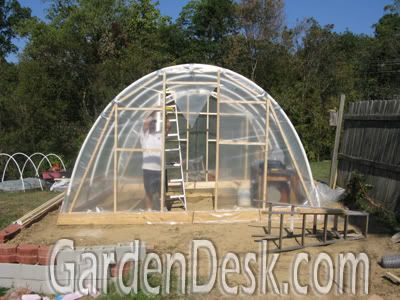
My daughters came out to check on the progress and decided to come on in. After the walls were finished and everything secured, we stretched and stapled the plastic on the end walls.

After the end walls were done, it was time to tackle the top plastic sheeting.

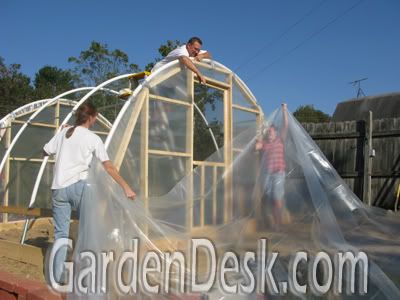
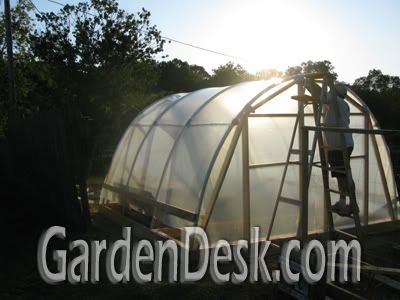
My wife and one daughter lifted it up to me while my other daughter took the pictures.

We got it put in place, used about 1,000 staples connecting it to the framework, and trimmed off the excess.

We finished just before the sun went down. At this point, the outside temperature was about 65 degrees. Inside the greenhouse it rose to 100 degrees! I still need to install an exhaust fan and get vent windows put together to control the inside temperature but I am encouraged by the fast temperature rise. I built insulated raised beds in half of this polytunnel and we plan to grow salad crops in there all Fall and Winter and then start many early plants in the Spring.

We have more to learn about how to care for plants inside a greenhouse, so any advice is welcome.

Happy Fall Gardening!

GardenDesk   © 2008. Template Recipes by Emporium Digital

TOP