Showing posts with label Tips and Tricks. Show all posts

Wednesday, October 15, 2008

Garbage Can Potato Harvest!

I like to try new things in the garden. Every year I find new things to grow and new methods to try. One of the "experiments" this year was trying to maximize yield by growing potatoes in a garbage can. I have been receiving many questions about the status of these potatoes. Well, we finally knocked over the can to see if it worked.

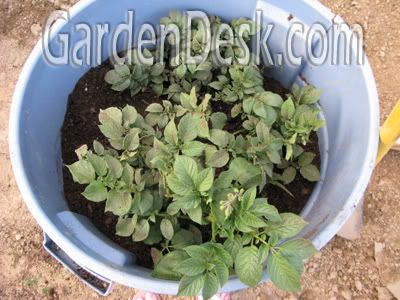
The idea is that you plant the seed potatoes down in the bottom of the can. As the plants grow, you fill more soil around them. Eventually, the can is filled to the top with soil and the plants are growing out of the top like this:
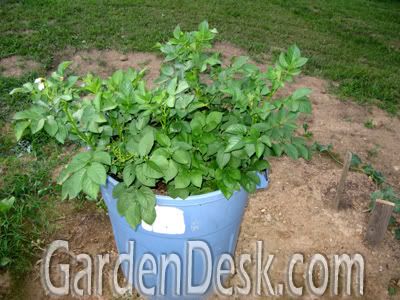
With proper nutrients and moisture, the potato plants send out new tuber growth all along the buried stems. The hope is that at harvest time, the garbage can would be filled with potatoes. You can see my first two posts about this idea here and here.

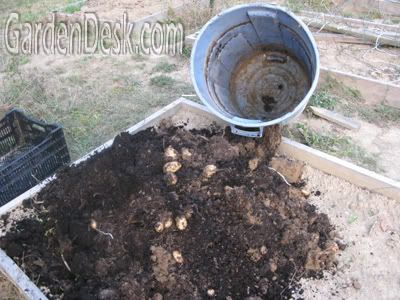
So it is finally time to harvest these garbage can potatoes. Here we go:
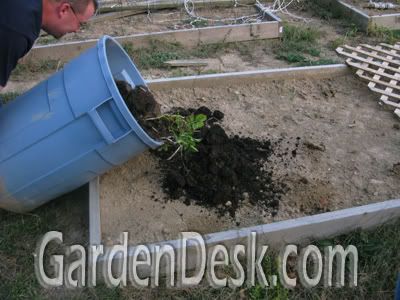
Wow, looks great doesn't it?

I could stop with the above pictures and say that everyone should switch to this method, but I won't. I always say that the purpose of this blog is to document happenings in my organic garden - to report what works and what doesn't.

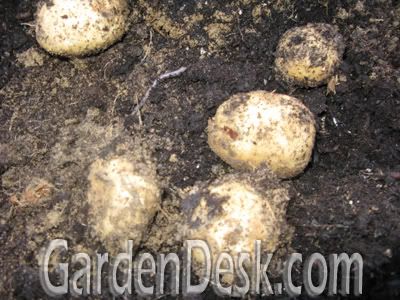
Writing about what works is more fun, but this potato can actually didn't work very well. Here is a picture of the complete harvest:
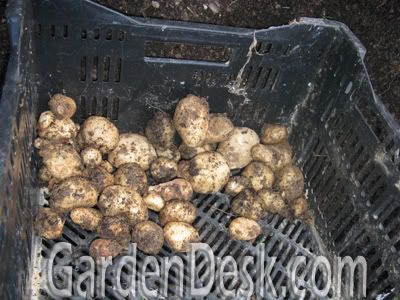
That's not any more than I would have gotten if I had just planted these potato plants in the ground. So what happened?

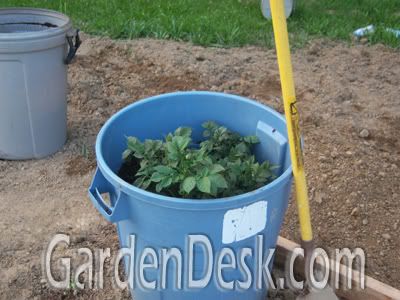
First of all, I had four or five plants growing out of the can in the first picture of this post. All but one plant died in July. This is what the can looked like before I knocked it over:
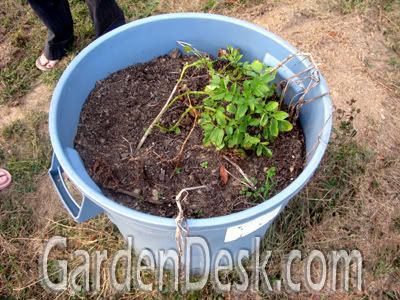
All of these puny little potatoes might have come from this one plant. The bigger problem I think I had was that the plants didn't get enough water. When I try it again next year (and I will), I think I should change my soil mix. This mix was mostly compost, peat and regular garden soil. Next year I will add sand and have much bigger drainage holes at the bottom of the can. I want to be able to water more often and more thoroughly without the worry of being too wet.

What about you? Do you have any ideas about how to make this concept work? I know it can work. We have done it before on a smaller scale. My daughter had success with this last year with potatoes in her garden bed by enclosing two plants with wood and raising the soil around them. I know other gardeners who have raised potatoes like this in tires and even in garbage cans. What is the secret? If you have had success with this, please let us know. I know I've read about this on other good blogs but I don't remember where. If you have posted about this, please share the link for us. And if you haven't written about it, but have had some success with potato growing like this, please give us some tips.

I'm sorry to say that I am not an expert on this yet (obviously), but together I think we can perfect this method. It does work - but how?

Tuesday, August 5, 2008

How can you tell when the corn is ready?

How can you tell when the sweet corn is ready? When the raccoons eat half of it!

First of all, thank you to all who commented on my last post and especially those who voted on which post they would like me to write next. The winners were the potatoes in a garbage can update and the extra high raised bed trial details. Even though there weren't very many votes for my corn efforts, I have to write this one first because it is more timely.

I put up a six foot tall fence around the corn bed and I knew that wouldn't keep the coons out entirely. I was planning to fasten a roll of floppy chicken wire to the top of the fence to keep them from being able to successfully climb over it. I headed out to the corn with my roll of chicken wire only to discover that they had struck the night before:

I was too late. Look at how they diligently ate every kernel! So now, instead of taking the time to put on the chicken wire, we decided to pick the remaining ears of corn.

The raccoons ate over half of the ears but we still got a nice basket full. I'm happy with that especially considering the poor start this corn had.

Look how beautiful they look!

That last closeup doesn't really show the bi-color aspect of this corn. This is the Japanese Bicolor corn - Mirai 301BC. I first wanted to grow this early last year when I wrote a post about this Mirai corn from Park Seed.

This is a better picture of the bi-color aspect:

I have to say, Park delivered on its promise. This might very well be the best sweet corn I have ever eaten. Next year I hope to find a spot far enough in the yard to grow another variety (probably Silver Queen) along with Mirai for a true taste test.

As for this year, the Mirai was delicious but I failed in part in my battle against the coons. Before I leave you, let me at least show you how I wanted to keep them out but was too slow. First of all, I was going to aim my Scarecrow at the corn. The scarecrow was on the night of the attack, but it was guarding the beans against a groundhog attack.

Secondly, I was going to use the chicken wire like I mentioned earlier. I went ahead and fastened a portion of the wire to better show you what I had planned. This is what it would look like:

The chicken wire is fastened only at the bottom to the top of the fence. It stays floppy at the top with no support so when a raccoon attempts to climb it, it folds down on him which essentially dumps him off. Allow me to demonstrate with my daughters stuffed animal:

The leopard raccoon climbs the fence and reaches the chicken wire. When it continues up the chicken wire, its own weight causes the wire to bend down over it.

Not this time Ricky!

I'm pretty sure this would work well but I'll have to wait until next year to confirm it. I hope this idea can still benefit someone else this year.

I will soon be writing the raised bed post, a rainbow of cherry tomatoes post, and I will soon be dumping over the potato can to see how well that worked. Stay tuned and thanks for your patience.

Sunday, June 22, 2008

Potato Plants to the top of the Garbage Can

There seems to be more interest in growing potatoes in a garbage can this year. I have seen several garden bloggers doing it. I don't remember them all, but my friends Tracy at Outside and Gina at My Skinny Garden both have good starts of potatoes in a can growing.

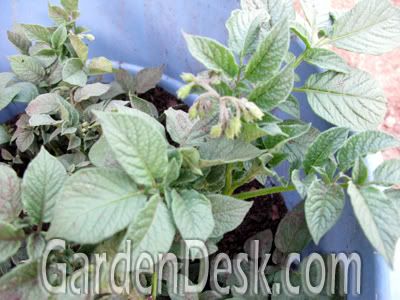
I am very pleased with the progress of my can-o-taters so far. The plants have reached the top of the can.

It has been easier this year because I had another can of good compost, peat and soil ready ahead of time. Last year I was always scrounging for some good growing medium. Soon I will add the rest of the soil mix and the can will be completely full. It will be good timing because the potato plants are beginning to bloom.

With this method, it is hard to rob the plant of "new" potatoes early in the season like I do with other planting methods.

With the garbage can potato method, I'll wait for the plants to die back, dump the can over and harvest a whole lot of spuds!

After the can is full of soil, the only thing for me to do for the rest of the summer is to be sure they stay well watered. Then its time for baked potatoes, mashed potatoes, home made french fries, scalloped potatoes, potatoes au gratin, hash brown potatoes .....

Tuesday, May 27, 2008

Potatoes in a Garbage Can?

I really enjoy trying new things in the garden. It makes my friends and neighbors consider my vegetable garden as "weird". For me though, the weirder the better. People think its odd that I grow white and black tomatoes, that I use strange methods for supporting those tomatoes, that I don't garden in rows and that I grow many things up tall trellises.

My new "weird" thing in the garden is growing potatoes in a garbage can!

This is not my original idea, but it is a great one. You drill a bunch of holes in the bottom of the can, fill it with a foot of good compost and soil and then plant the seed potatoes. You probably should only put four potatoes or cured potato pieces in the can but I over did it a bit.

Then you cover the potatoes, water well and watch 'em grow. When the tops get about a foot tall you add about six more inches of good soil to the can, burying the lower portions of the stems. Keep that up all summer and eventually the can will be filled to the top with soil and compost and the plants will be growing out of the top of the can.

More tubers will form all along the stems that you buried so at harvest time you will have a whole can full of potatoes! This is my first year trying this, but I know it will work. I have seen other gardeners do it successfully and I have applied this principle on a smaller scale before. For the past few years I have grown potatoes in a small raised bed and added extra wood sides and more compost as they grow. My 10-year old daughter even did this last year in her garden. If you don't want to have an ugly trash can in your garden and you, unlike me, don't want to be called "weird", you could at least try my daughter's wood box around the potatoes idea. You could probably even add it to some of your existing potato plants.

As for me, these aren't the only potatoes I'm growing but I am looking forward to playing with my ugly blue potato can at the end of the garden. I planted them a few days ago and now they have sprouted!

Weird gardening is fun.

Friday, March 28, 2008

How to Plant Leggy Tomatoes with the Trench Method

I wrote in my "how to grow healthy seedlings" post that you should be careful not to plant under the lights too early. My example was tomatoes. Kimberley from The Life of a Garden and some others have expressed concern now that their early-started tomatoes might get too big and leggy before planting time.

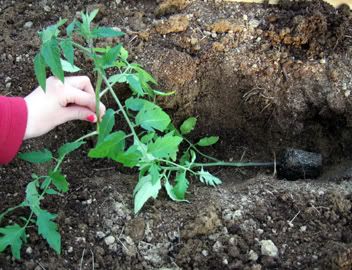
I didn't mean to scare anyone. If your tomato plants do get leggy, don't worry. You can always correct that at planting time by burying more of the stem.After the danger of frost in your area has passed, you should plant too-tall tomatoes very deep in the ground. This encourages adventitious roots to develop along the buried portion of the stem. Its also okay to snap off the lower branches if necessary.

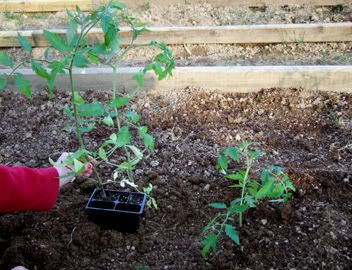
If you can't get a deep enough hole, you can plant the tomato sideways in a trench and carefully bend it upright so the above ground portion is straight. Even if it isn't all the way straight, the plant will adjust itself later.

When planting this way, you can't even tell the tomato plant was too tall when you're finished. Look at how much taller the plants are in the cell pack than the one that from that same pack that was planted with the trench method.

Just be careful not to bend it so far that you snap it in two! Also, when watering it early on, remember where you buried the root ball portion on the plant.

Happy planting!

GardenDesk   © 2008. Template Recipes by Emporium Digital

TOP